# wuyongGitHub.github.io
**Repository Path**: zhengjd/wuyongGitHub.github.io
## Basic Information
- **Project Name**: wuyongGitHub.github.io
- **Description**: No description available
- **Primary Language**: Unknown
- **License**: Not specified
- **Default Branch**: main
- **Homepage**: None
- **GVP Project**: No
## Statistics
- **Stars**: 0
- **Forks**: 0
- **Created**: 2025-11-27
- **Last Updated**: 2025-11-27
## Categories & Tags
**Categories**: Uncategorized
**Tags**: None
## README
# Vue 3 + TypeScript + Vite
预览地址:https://wuyonggithub.github.io/


 ## vsCode 安装插件
vsCode插件市场查找 @recommended 一键安装相应插件,
EsLint@2.4.4、StyleLint@1.4.0、Vue - Official@2.0.16、Prettier@10.4.0
## 安装依赖
npm install
## 安装 husky
npm prepare
## git设置大小写文件区分
git config core.ignorecase true
## eslint 不生效?
npm lint
## 项目启动
npm start
## 组件格式
└── 组件名称 xxxx
├── components ---子组件
├── xxx.hooks.[js|ts] ---hooks
├── xxxx.vue ---默认都为index
├── public.[js|ts|vue] ---用来存放静态变量或者纯函数(非必须)
├── style.scss ---样式文件
└── type.ts ---ts类型文件
注意: components下的文件夹或者文件首字母必须大写
> 存在多个子文件情况
└── components xxxx
└── Chart ---子组件名称文件夹
├── xxx.hooks.[js|ts] ---hooks
├── Chart.vue ---默认都为index
├── public.[js|ts|vue] ---用来存放静态变量或者纯函数(非必须)
├── style.scss ---样式文件
└── type.ts ---ts类型文件
> 单个文件情况
└── components xxxx
└── Chart.vue ---子组件名称
## 开发规范
1. 请求接口方法名全部用 get | set
2. 操作方法名 handle
3. 计算方法名 compute-一定要存在返回值
4. 渲染组件方法名 render
5. 初始化 init
## 分支规范
1. master_imp 主分支
2. develop 开发分支
3. feature/xxx 功能分支
4. fix/xxx 修复分支
5. hotfix/xxx 紧急修复分支
6. docs/xxx 文档分支
7. refactor/xxx 重构分支
8. style/xxx 样式分支
9. test/xxx 测试分支
10. chore/xxx 构建分支
11. ci/xxx 持续集成分支
12. build/xxx 打包分支
13. perf/xxx 性能分支
## 推送代码
- 切换到dist目录
- 切换为 npm 镜像源
- 修改package版本
- npm adduser
- npm publish
## 组件开发流程
- 在`Wy-design/packages/components/`下建立组件
- 在`Wy-design/examples/`下建立测试组件
- 组件开发完成,在 `Wy-design/packages/components/index` 路径下添加相关组件、同时需要在`Wy-design/typings/components.d` 中新增类型,确保组件打包后可以正常识别类型
## 注意
打包时候如遇到`windows is undefined` 则添加判断 `if (!import.meta.env.SSR)`
# Vue3 + VitePress 搭建部署组件库文档平台(结合 Element Plus 与 Arco Design Vue)—— 超详细图文教程
@[toc]
## 简介
[【代码仓库,拉取即用,https://github.com/wuyongGitHub/wuyongGitHub.github.io】](https://github.com/wuyongGitHub/wuyongGitHub.github.io)
其实下面的安装和配置步骤完全可以不用细看,那些只是辅助性的说明文档。你只需要从代码仓库中克隆或下载项目源码,然后在本地简单运行一下,再将代码推送到自己的 `GitHub`仓库,就可以快速搭建并部署一套属于你自己的组件文档平台或知识库系统。整个过程非常简便,无需复杂的配置,开箱即用,特别适合用于展示项目文档、技术笔记或团队知识沉淀。
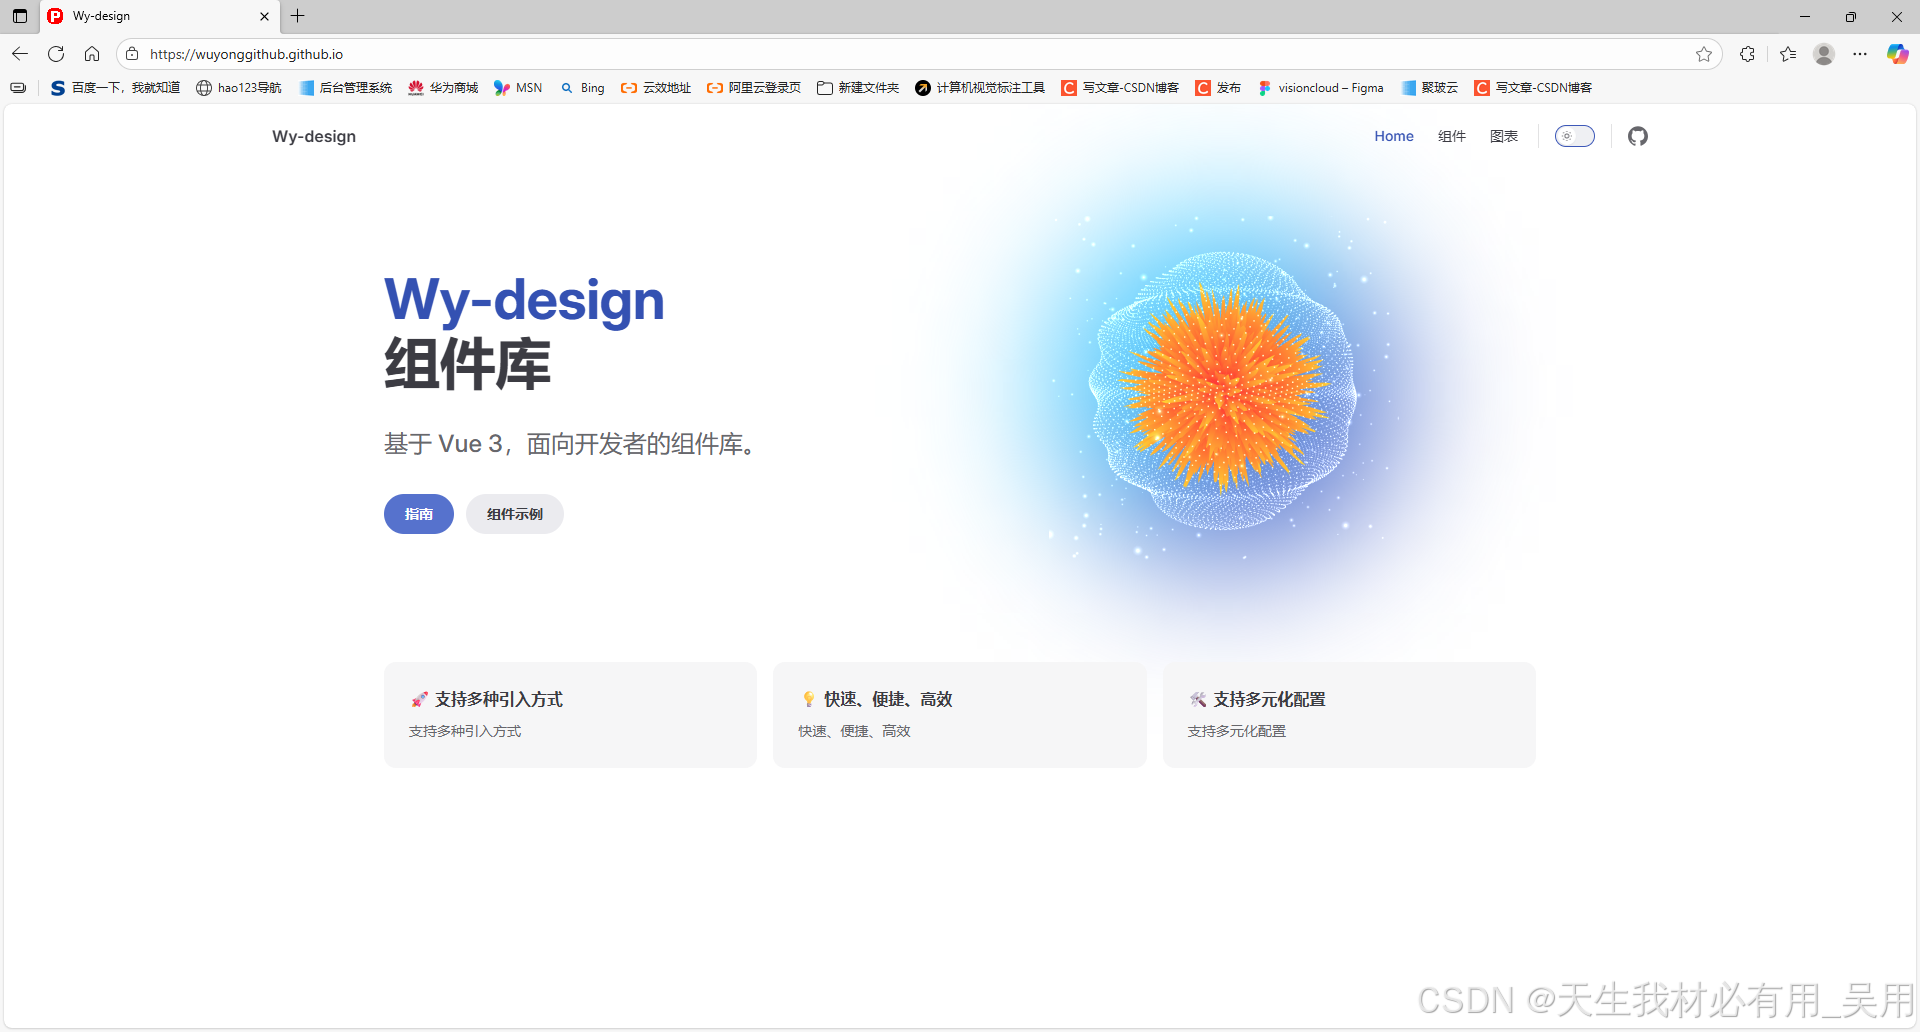
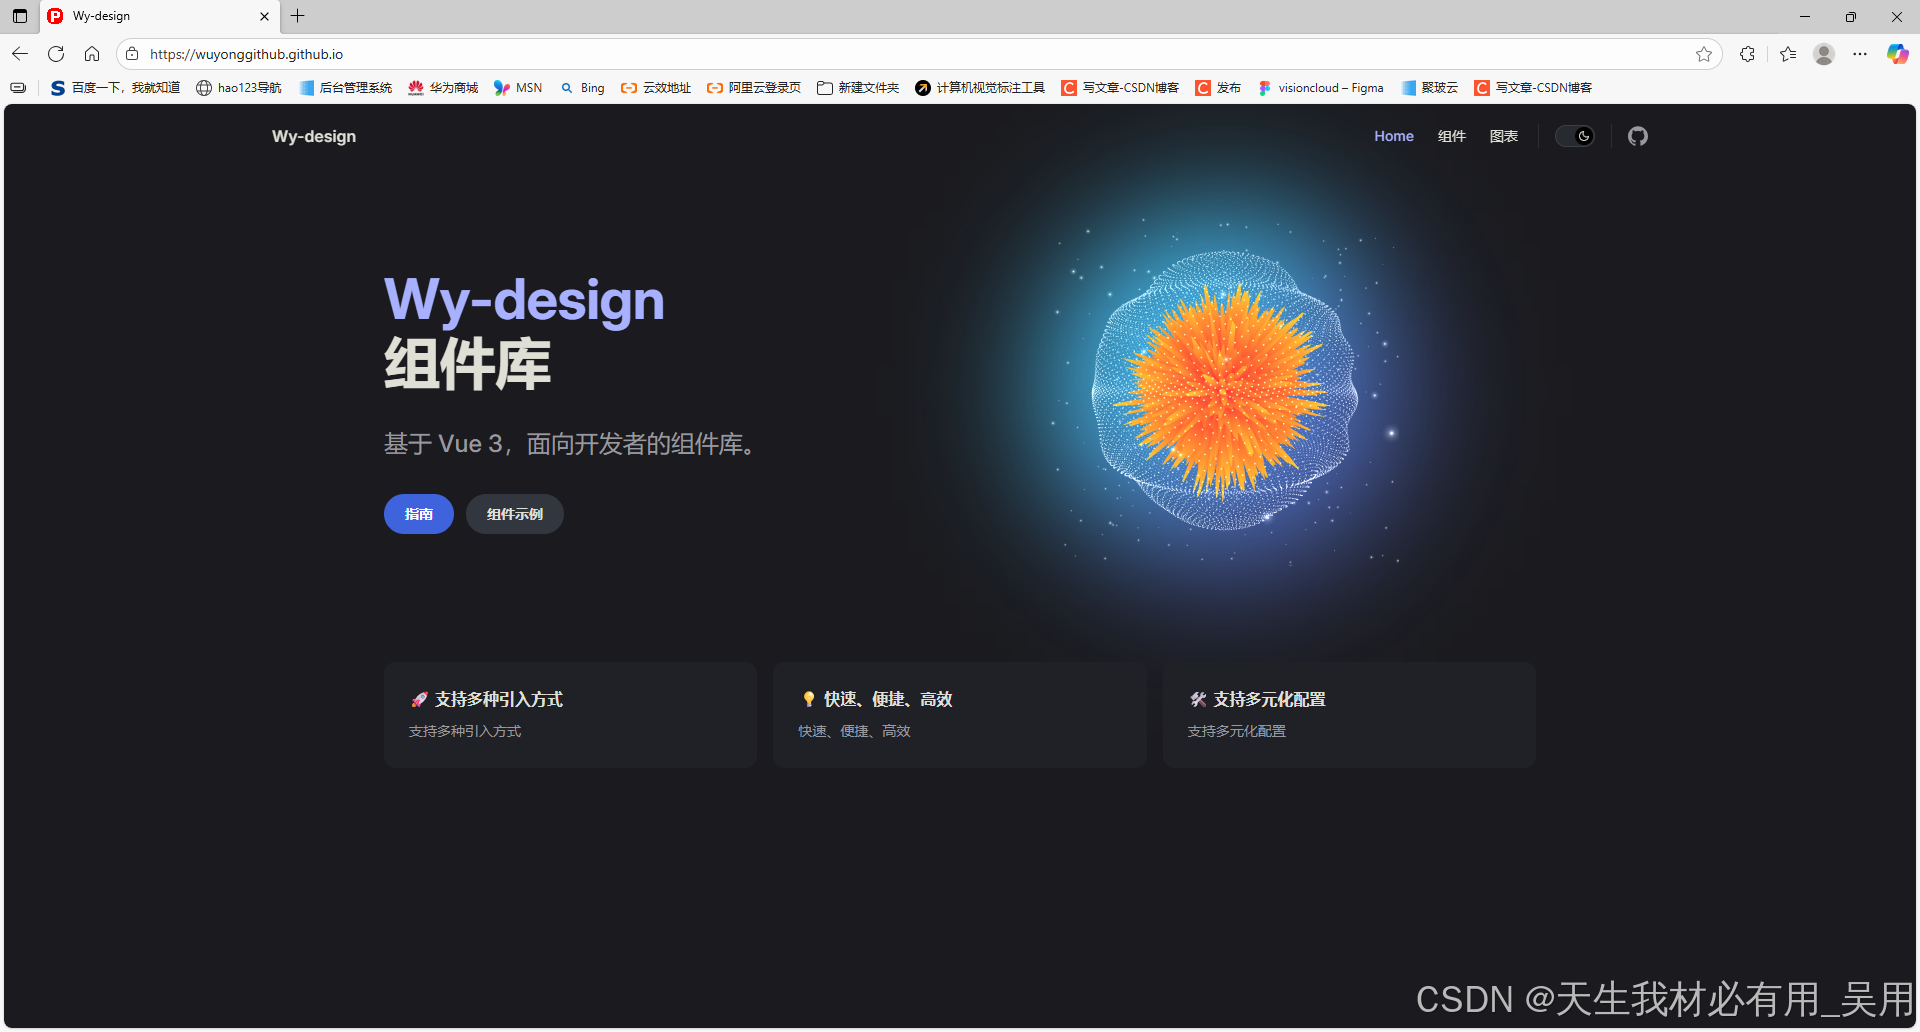
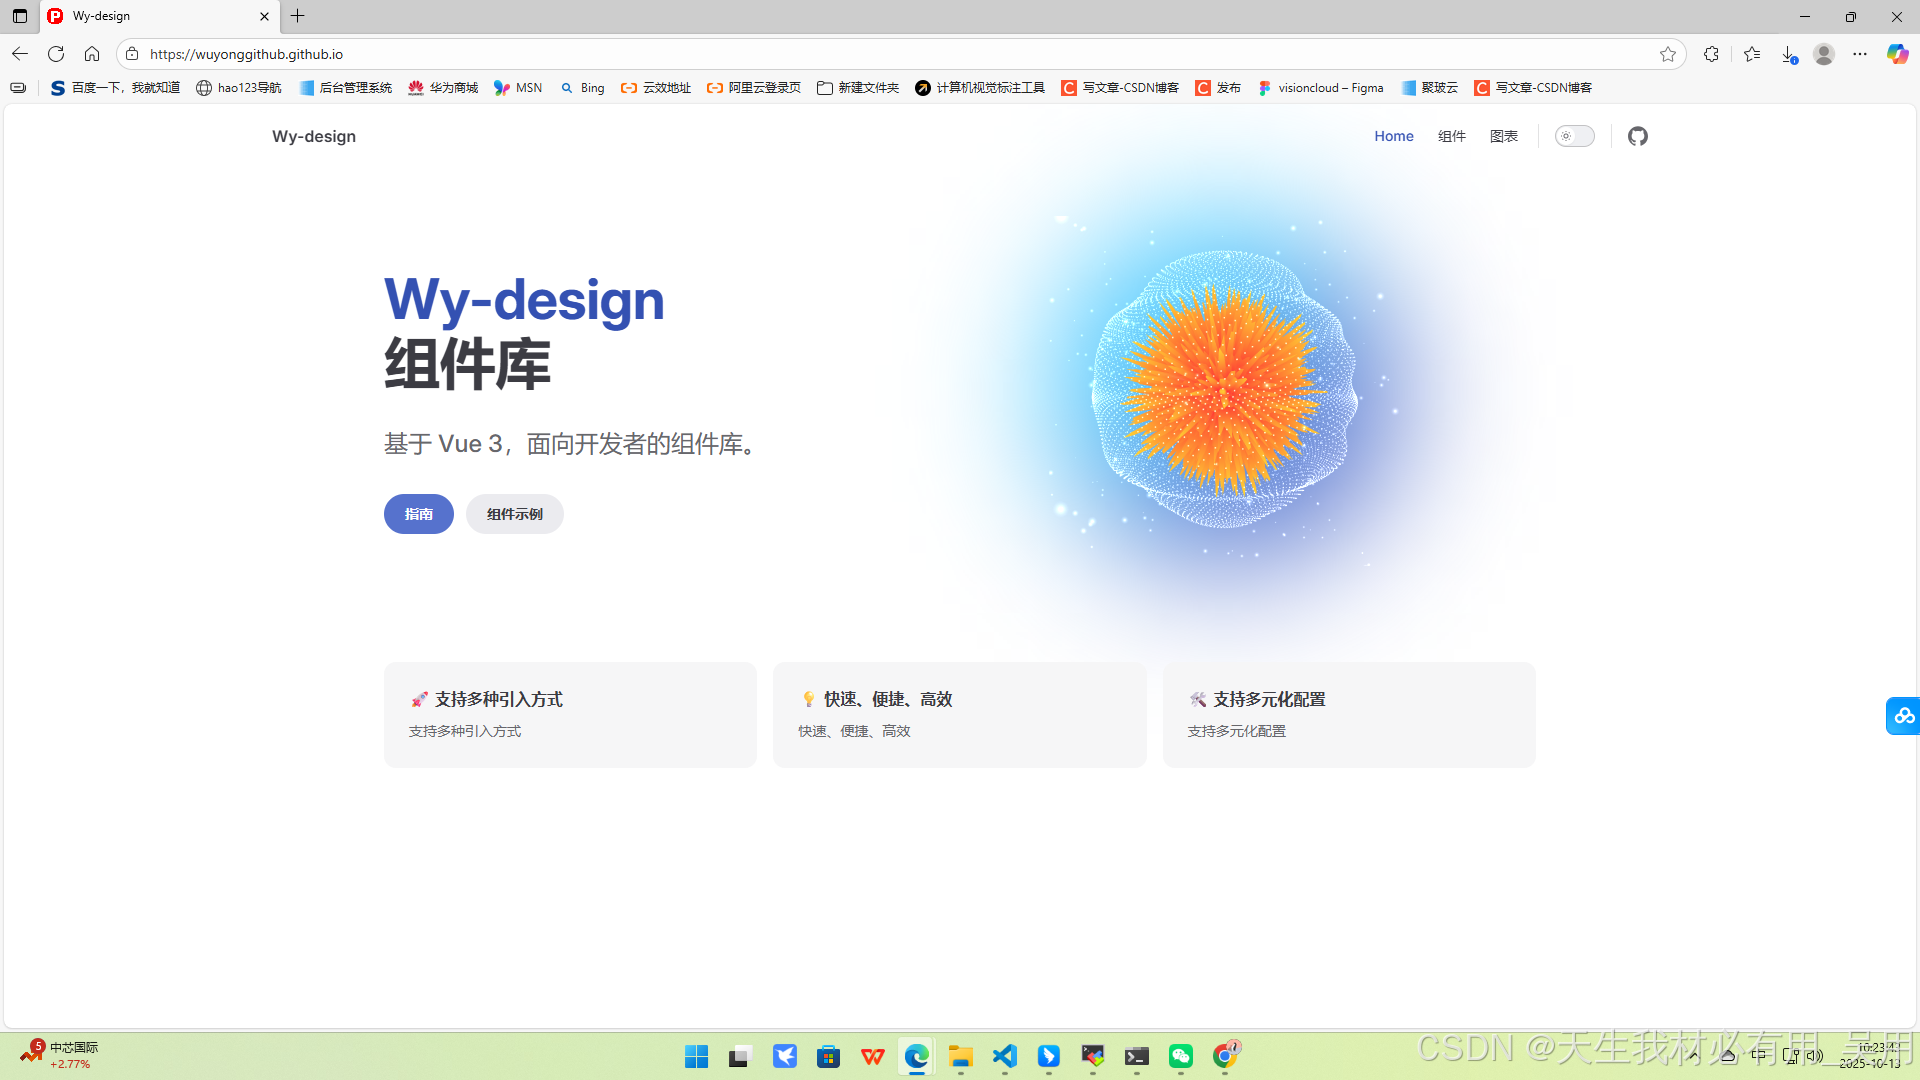
### 预览效果
[部署后的成品地址:https://wuyonggithub.github.io/](https://wuyonggithub.github.io/)
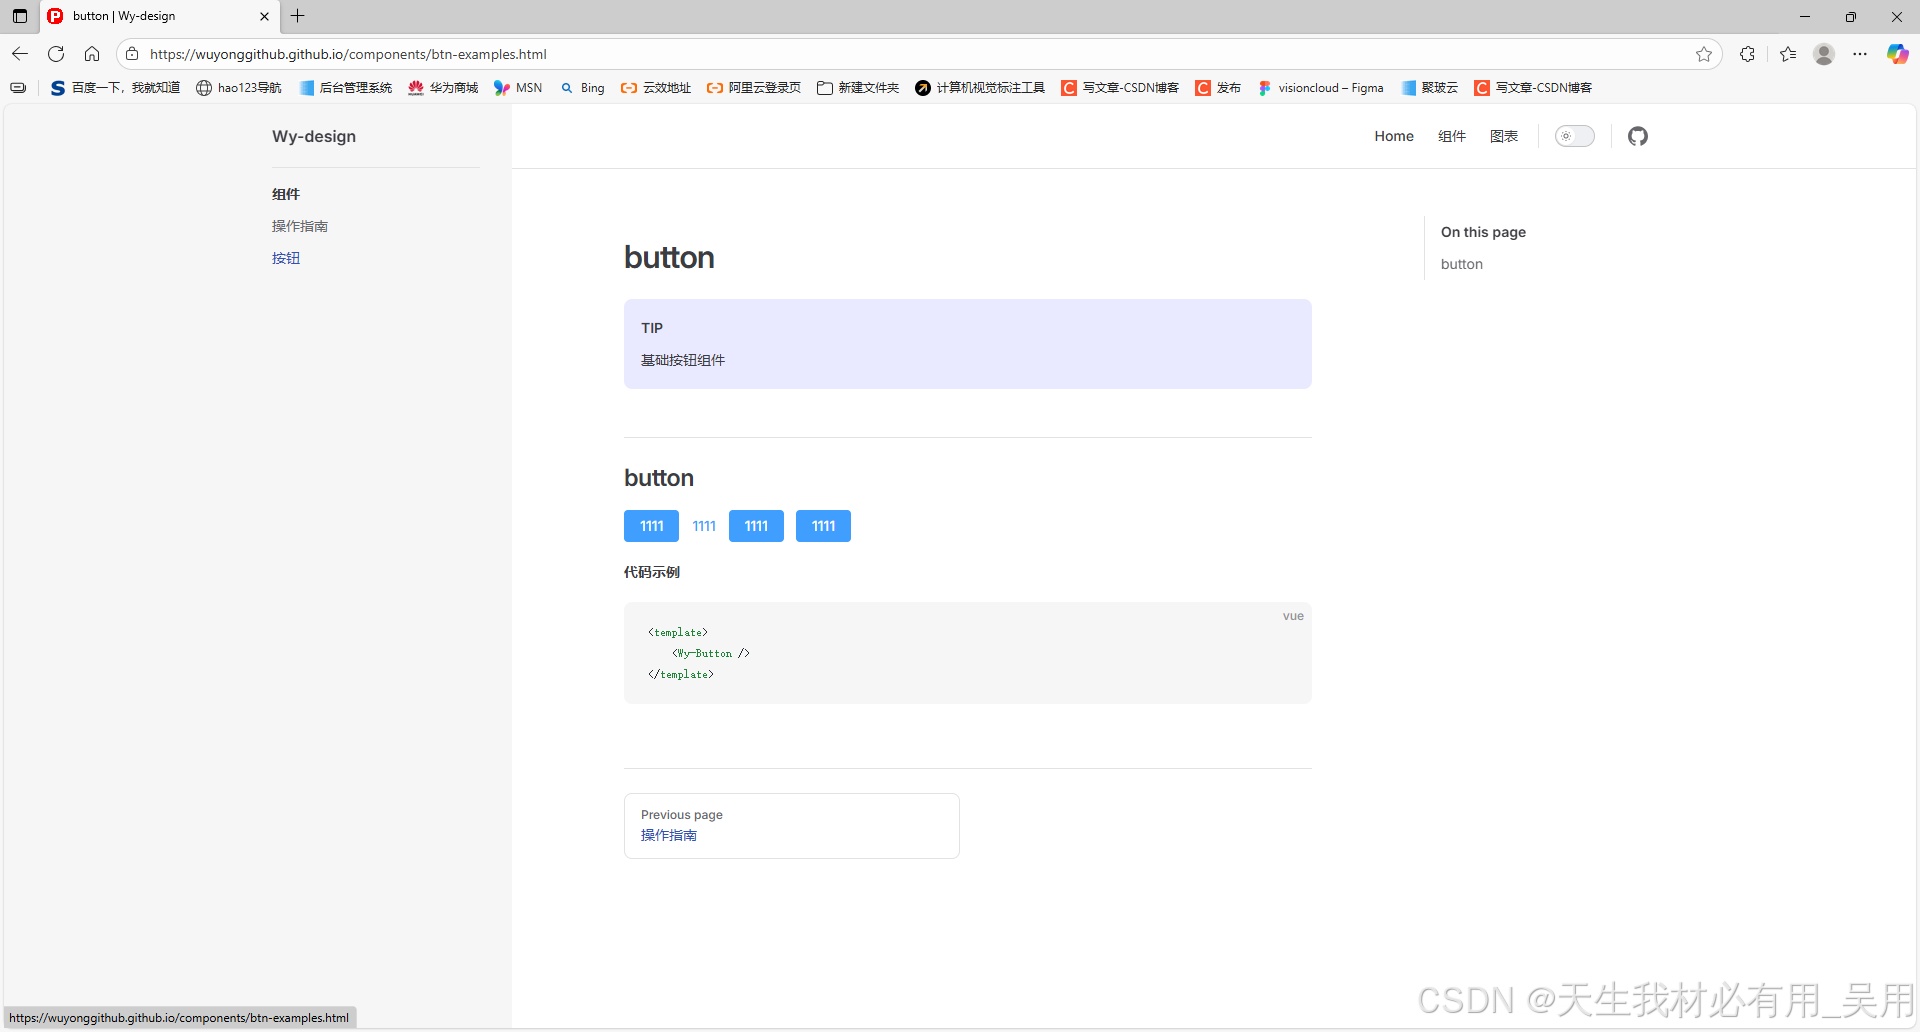
简易二次封装的按钮组件:
### 本文内容
由于前端组件数量较多,如果没有一个固定的组件库平台进行统一管理,很容易导致组件被遗忘或不清楚如何使用的情况。为了解决这一问题,我将结合自己在企业项目中的实战经验,分享如何利用 `Vue3` 和 `VitePress` 搭建专属的文档站点,打造个性化的知识库平台,并实现对组件库的二次开发与定制化。该方案不仅结构清晰、维护便捷,还能随着组件库的持续演进,同步更新文档内容,真正做到文档与代码协同发展,提升团队协作效率与项目可维护性。
> 1. `VitePress` 安装与配置。
> 2. 组件封装与注册。
> 3. 在 `Markdown` 中使用组件预览。
> 4. 同时引入 `Element Plus` 与`Arco Design Vue`。
> 5. 自动构建 & 部署到 `GitHub Pages`。
> 6. 实际案例演示。
## 详细实现步骤【自用】
下面步骤仅仅做个人搭建向导,如看不懂还挺直接拉取`github`【[https://github.com/wuyongGitHub/wuyongGitHub.github.io](https://github.com/wuyongGitHub/wuyongGitHub.github.io)】仓库代码,根据步骤进行理解配置。
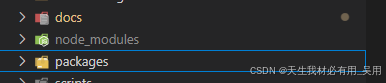
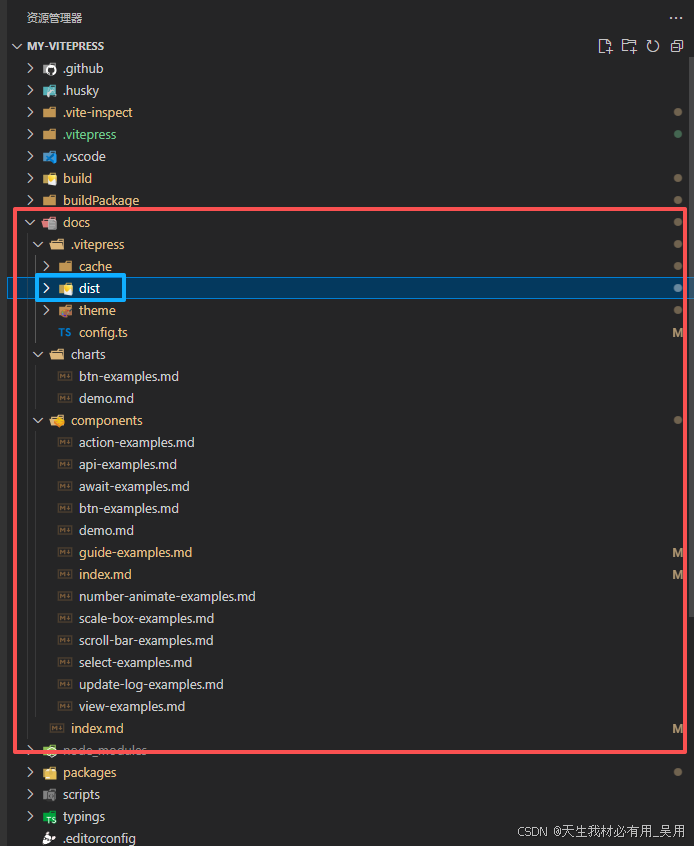
### 第一步、项目目录结构及说明
> MY-VITEPRESS/
├── docs/ # 文档内容(Markdown)
│ └── components/ # 示例页面
│ ├── btn-examples.md
│ └── index.md
├── packages/ # 封装的组件源码
│ ├── components/ # Vue 组件
│ │ └── MyButton.vue
│ ├── directives/
│ ├── examples/ # 使用示例代码
│ └── theme-chalk/ # 样式变量
├── .vitepress/ # VitePress 配置
│ ├── config.ts
│ └── theme/
├── vite.config.ts
└── package.json
注意:docs 是文档入口,packages 是组件源码,两者分离但通过 VitePress 动态绑定。
### 第二步、项目初始化
新建MY-VITEPRESS文件夹
```typescript
mkdir MY-VITEPRESS
cd MY-VITEPRESS
npm init -y
```
### 第三步、安装核心依赖
```typescript
npm install vue@3 vite @vitejs/plugin-vue -D
```
### 第四步、安装 VitePress
`vitepress` 是独立运行的,不依赖 `vite` 项目本身,但可以共存。
```typescript
npm install vitepress -D
```
### 第五步、创建 VitePress 文档站点
创建/docs/index.md,并写入内容
```typescript
---
title: 我的组件库文档
description: 基于 Vue3 + VitePress + Element Plus 的组件库文档
---
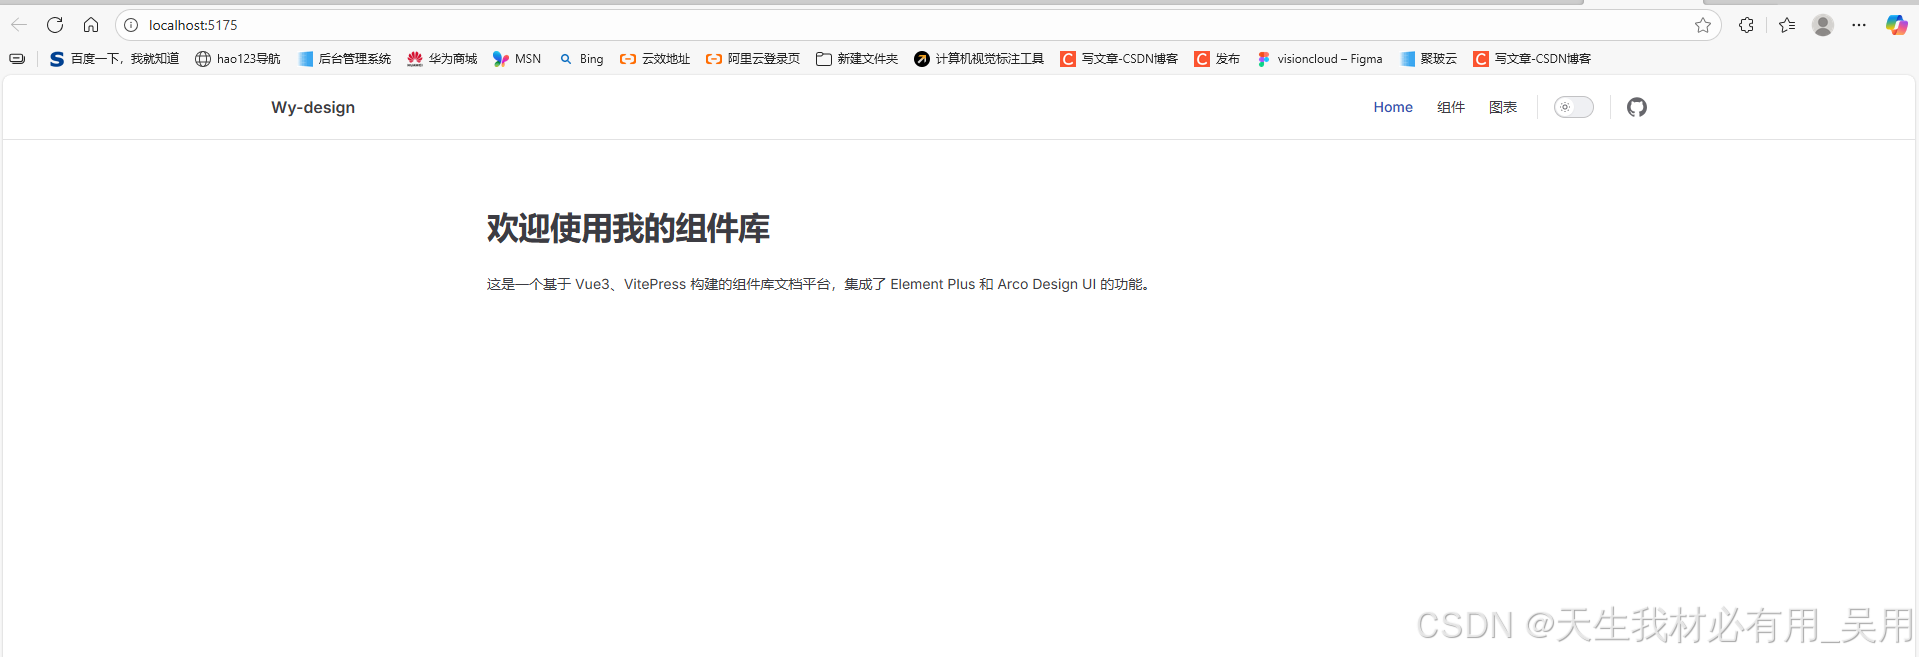
# 欢迎使用我的组件库
这是一个基于 Vue3、VitePress 构建的组件库文档平台,集成了 Element Plus 和 Arco Design UI 的功能。
## 快速开始
```vue
点击我
```
在根目录执行`npm run docs:dev`
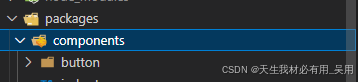
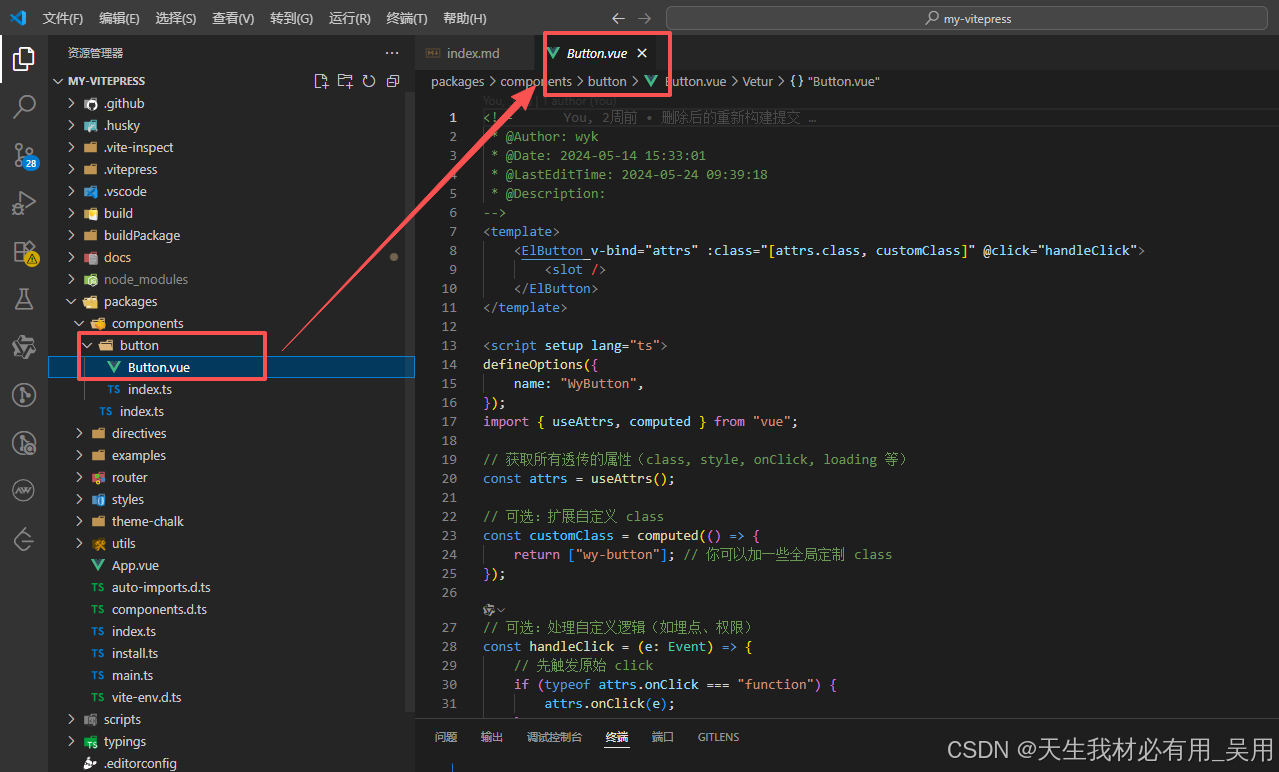
### 第六步、构建组件库(packages)
1. 创建 `packages` 文件夹,与docs同级目录。
2. 创建 `components/button`,封装你的组件。
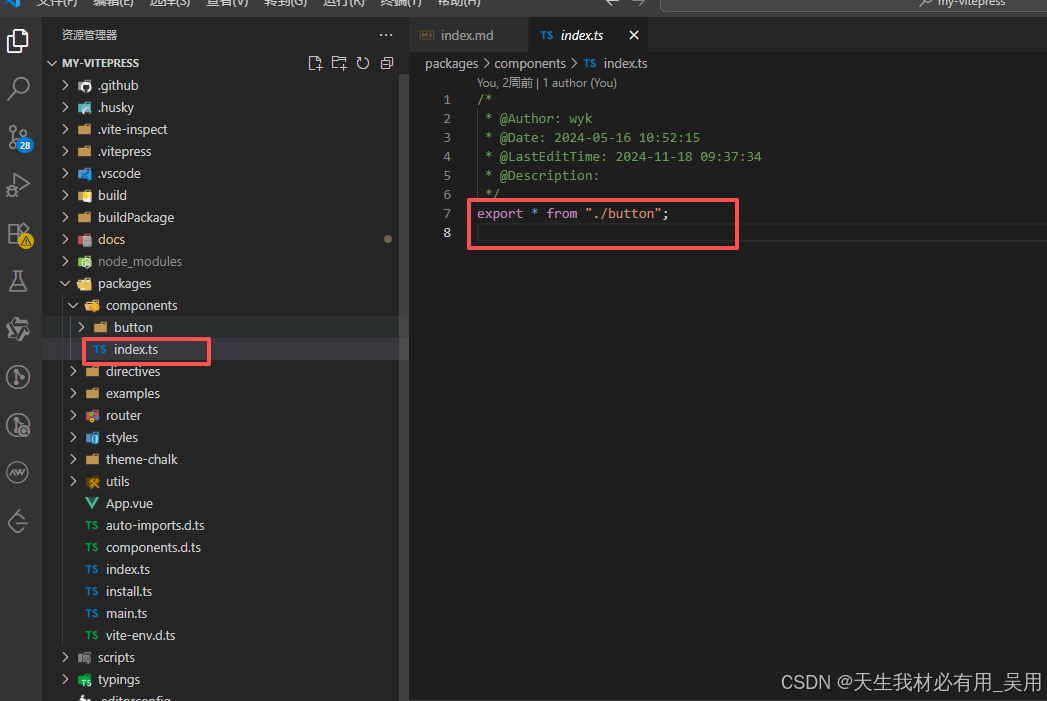
3. 创建`packages/components/index.ts`
4. 创建 `packages/directives/domResize.ts`
```typescript
// packages/directives/domResize.ts
import { DirectiveBinding } from 'vue';
export const domResize = {
mounted(el: HTMLElement, binding: DirectiveBinding) {
const resizeHandler = () => {
binding.value?.(el.offsetWidth, el.offsetHeight);
};
window.addEventListener('resize', resizeHandler);
resizeHandler();
},
unmounted(el: HTMLElement) {
window.removeEventListener('resize', () => {});
}
};
```
### 第七步、集成 Element Plus & Arco Design UI
1. 安装 Element Plus,安装 Arco Design Vue
```typescript
npm install element-plus -S
npm install @arco-design/web-vue -S
```
2. 引入样式(在 main.ts 中)
```typescript
import { createApp } from "vue";
import App from "./App.vue";
/* 样式文件 */
import router from "./router";
import { domResize } from "./directives/domResize";
import "./theme-chalk/global.scss";
import ArcoVue from '@arco-design/web-vue';
import ElementPlus from 'element-plus'
import '@arco-design/web-vue/dist/arco.css';
import './styles/element/index.scss'
const app = createApp(App);
app.directive("domResize", domResize);
app.use(ArcoVue);
app.use(ElementPlus)
app.use(router).mount("#app");
```
### 第八步、批量注册组件
创建packages/index.ts文件,内容如下:
```typescript
/*
* @Author: wyk
* @Date: 2025-09-25 09:44:38
* @LastEditTime: 2024-05-24 18:58:39
* @Description:
*/
export * from "./components";
import { installer as install } from "./install";
export default install;
```
将你封装的所有组件进行批量注册,使其能够通过 `app.use()` 的方式全局安装到 `Vue` 应用中。
### 第九步、配置 VitePress 主题与组件演示
```typescript
import { defineConfig } from "vitepress";
import { resolveConfig, pluginsConfig } from "../../scripts/preview.ts";
export default defineConfig({
title: "Wy-design",
description: "组件库",
base: "/",
vite: {
server: {
port: 5175,
},
resolve: resolveConfig,
plugins: pluginsConfig,
},
themeConfig: {
nav: [
{ text: "Home", link: "/" },
{ text: "组件", link: "/components/guide-examples" },
{ text: "图表", link: "/charts/demo" },
],
// 使用路径映射来控制侧边栏
sidebar: {
// 当前路径以 /guide-examples 开头时,显示“组件”侧边栏
"/components/": [
{
text: "组件",
items: [
{ text: "操作指南", link: "/components/guide-examples" },
{ text: "按钮", link: "/components/btn-examples" },
],
},
],
// 当前路径以 /demo 开头时,显示“图表”侧边栏
"/charts/": [
{
text: "图表",
items: [{ text: "demo1", link: "/charts/demo" }],
},
],
},
socialLinks: [{ icon: "github", link: "https://github.com/wuyongGitHub/wuyongGitHub.github.io" }],
},
});
```
### 第十步、vitpress使用组件打包配置
新建`docs/.vitepress/theme/index.ts`,引入打包后的dist
```typescript
import Theme from "vitepress/theme";
import { App, h, defineAsyncComponent } from "vue";
import asyncComponents from "@/examples/index";
import { domResize } from "@/directives/domResize";
// 样式
import "element-plus/dist/index.css";
import "@arco-design/web-vue/dist/arco.css";
import "../../../packages/styles/element/index.scss";
// 必须引入并注册组件库
import ElementPlus from "element-plus";
import ArcoVue from "@arco-design/web-vue";
const WyBasicsDocsImage = defineAsyncComponent(() => asyncComponents.then((Components) => Components["WyBasicsDocsImage"]));
export default {
...Theme,
Layout() {
return h(Theme.Layout, null, {
"home-hero-image": () => {
return h(WyBasicsDocsImage);
},
});
},
async enhanceApp({ app }: { app: App }) {
let Components = await asyncComponents;
app.directive("domResize", domResize);
// 注册 UI 库
app.use(ElementPlus);
app.use(ArcoVue);
// 注册你二次封装的组件
for (let i in Components) {
app.use(Components[i]);
}
},
};
```
### 第十一步、本地开发和构建
```typescript
"scripts": {
"start": "vite --host --mode development",
"build": "vue-tsc --noEmit && vite build --mode developmentBuild && node buildPackage/vetur.js && node buildPackage/index.js ",
"preview": "vite preview",
"lint": "eslint . --ext .vue,.ts,.js,.jsx,.mjs --fix --ignore-path .gitignore",
"prettier": "prettier --write .",
"style": "stylelint 'packages/**/*.(css|scss)' --fix",
"prepare": "husky install",
"docs:dev": "vitepress dev docs",
"docs:build": "cross-env NODE_ENV=production vitepress build docs",
"docs:preview": "vitepress preview docs"
},
```
```typescript
npm run start:启动案例使用预览
npm run build:打包组件生成/build/dist目录
npm run docs:dev:启动本地文档预览,热更新
npm run docs:build:构建文档输出静态文件
npm run docs:serve:预览构建结果
```
### 第十二步、打包优化
`vite.config.ts`进行打包优化,排除了 `vue, element-plus` 等大型依赖打包。
```typescript
/*
* @Author: wyk
* @Date: 2022-11-22 10:22:48
* @LastEditTime: 2024-08-30 17:19:06
* @Description:
*/
import { defineConfig } from "vite";
import vue from "@vitejs/plugin-vue";
import { resolve } from "path";
import { pluginsConfig, resolveConfig } from "./scripts/preview";
import Inspect from "vite-plugin-inspect";
import dts from "vite-plugin-dts";
export default defineConfig(() => {
return {
build: {
outDir: "build",
cssCodeSplit: true,
rollupOptions: {
external: ["@ant-design/icons-vue", "ant-design-vue", "element-plus", "unplugin-vue-components", "unplugin-auto-import", "vue"],
output: [
{
format: "es",
entryFileNames: "[name].js",
exports: "named",
name: "JbDesign",
dir: "./build/dist",
},
{
format: "es",
entryFileNames: "[name].js",
exports: "named",
preserveModules: true,
preserveModulesRoot: "packages",
dir: "./build/es",
},
{
format: "cjs",
entryFileNames: "[name].js",
exports: "named",
preserveModules: true,
preserveModulesRoot: "packages",
dir: "./build/lib",
},
],
},
lib: {
entry: resolve(__dirname, "./packages/index.ts"),
name: "JbDesign",
fileName: (format) => `Wy-design.${format}.js`,
formats: ["es", "cjs"],
},
},
plugins: [
vue(),
dts({
tsconfigPath: "./tsconfig.prod.json",
outDir: "build/lib",
}),
dts({
tsconfigPath: "./tsconfig.prod.json",
outDir: "build/es",
}),
...pluginsConfig,
// Inspect({
// build: true,
// outputDir: ".vite-inspect",
// }),
],
resolve: resolveConfig,
};
});
```
### 第十三步、打包测试
执行`npm run build`命令,进入打包
将`build`文件名改成`Wy-Design`,移入需要使用的项目,后期会将该包上传到`npm`服务或者`npm`私服中,通过`install`进行安装拉取使用。
在需要使用该组件包的项目中全局注册使用:
```typescript
import wyDesign from "./Wy-Design/dist/index";
import "./build/dist/index.css";
app.use(wyDesign);
```
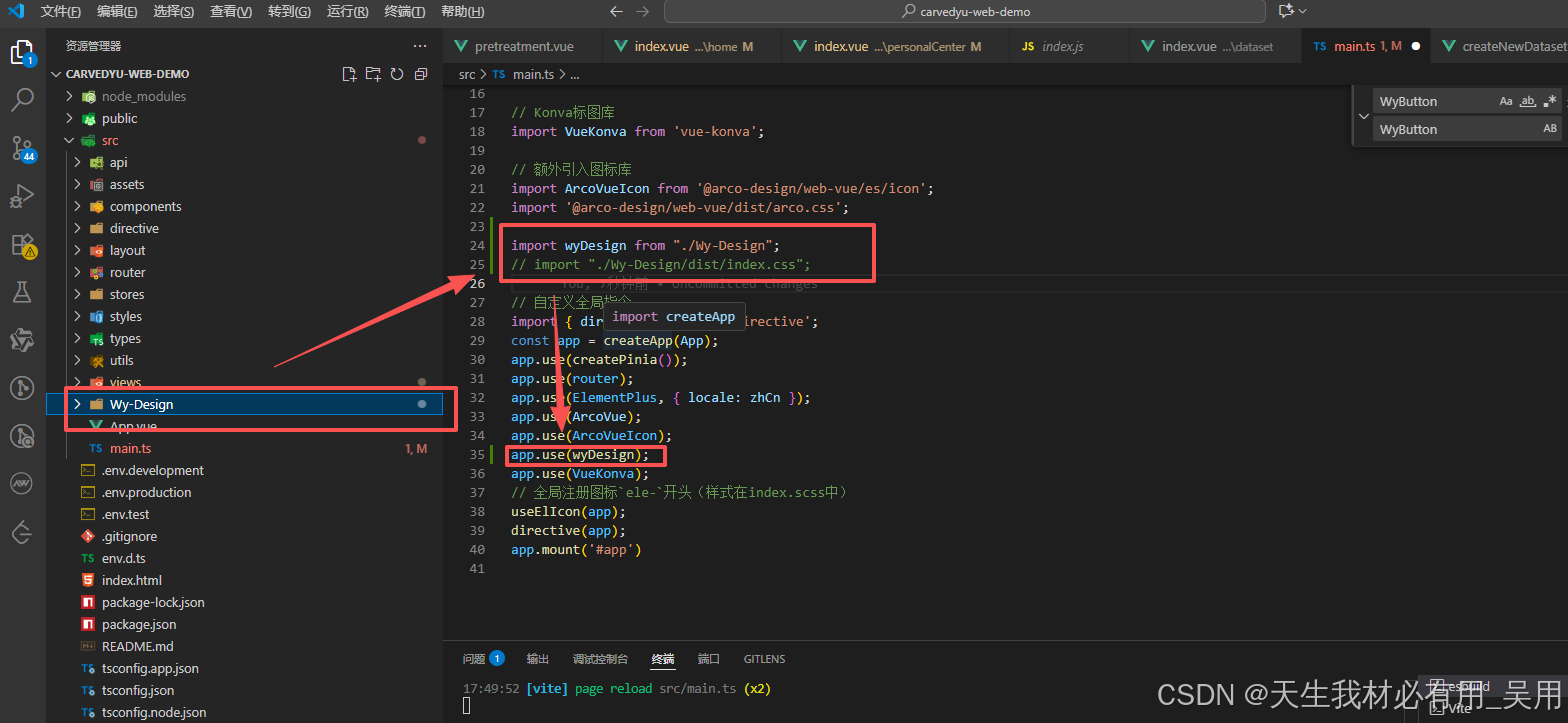
或者按需引入
```typescript
import { WyButton } from "../../Wy-Design";
```
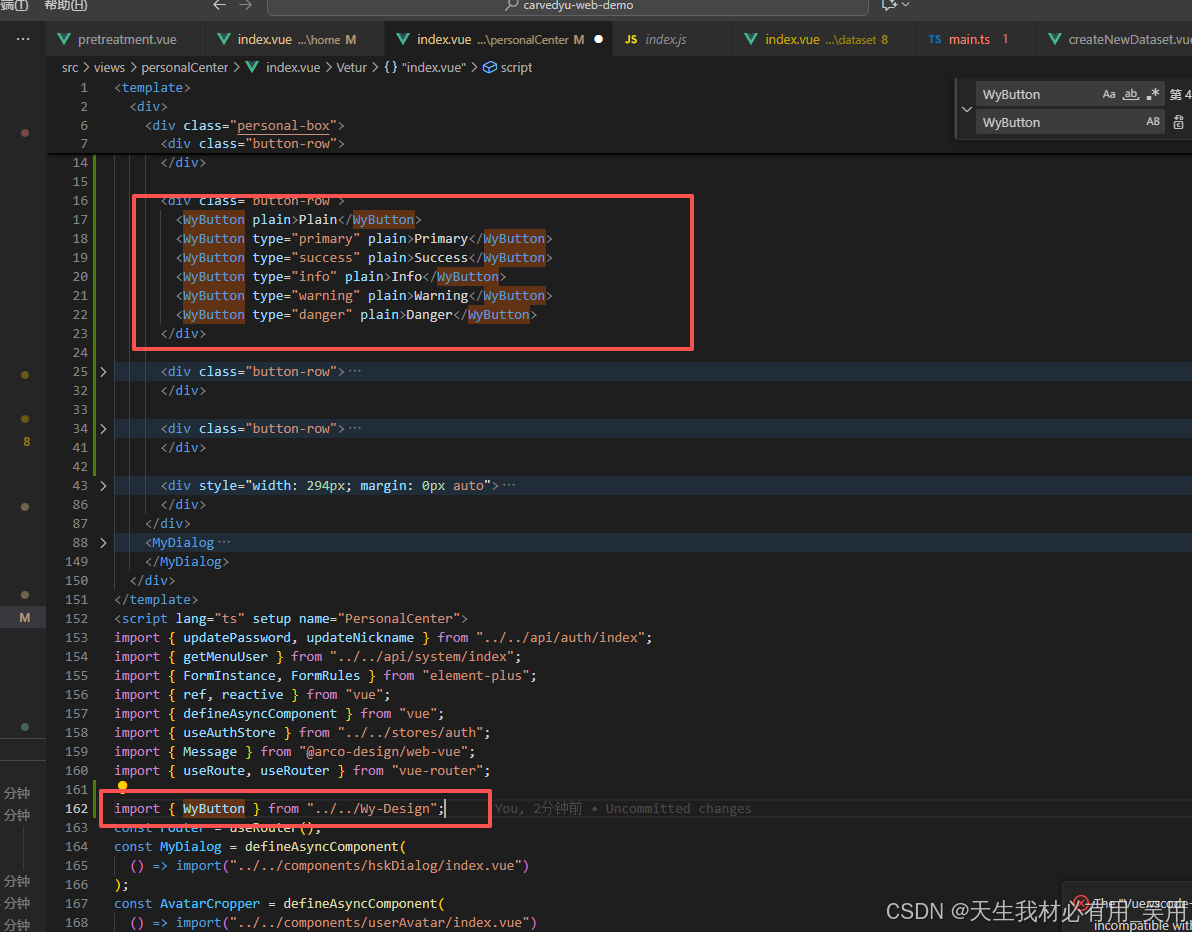
### 第十四步、使用组件
```typescript
## vsCode 安装插件
vsCode插件市场查找 @recommended 一键安装相应插件,
EsLint@2.4.4、StyleLint@1.4.0、Vue - Official@2.0.16、Prettier@10.4.0
## 安装依赖
npm install
## 安装 husky
npm prepare
## git设置大小写文件区分
git config core.ignorecase true
## eslint 不生效?
npm lint
## 项目启动
npm start
## 组件格式
└── 组件名称 xxxx
├── components ---子组件
├── xxx.hooks.[js|ts] ---hooks
├── xxxx.vue ---默认都为index
├── public.[js|ts|vue] ---用来存放静态变量或者纯函数(非必须)
├── style.scss ---样式文件
└── type.ts ---ts类型文件
注意: components下的文件夹或者文件首字母必须大写
> 存在多个子文件情况
└── components xxxx
└── Chart ---子组件名称文件夹
├── xxx.hooks.[js|ts] ---hooks
├── Chart.vue ---默认都为index
├── public.[js|ts|vue] ---用来存放静态变量或者纯函数(非必须)
├── style.scss ---样式文件
└── type.ts ---ts类型文件
> 单个文件情况
└── components xxxx
└── Chart.vue ---子组件名称
## 开发规范
1. 请求接口方法名全部用 get | set
2. 操作方法名 handle
3. 计算方法名 compute-一定要存在返回值
4. 渲染组件方法名 render
5. 初始化 init
## 分支规范
1. master_imp 主分支
2. develop 开发分支
3. feature/xxx 功能分支
4. fix/xxx 修复分支
5. hotfix/xxx 紧急修复分支
6. docs/xxx 文档分支
7. refactor/xxx 重构分支
8. style/xxx 样式分支
9. test/xxx 测试分支
10. chore/xxx 构建分支
11. ci/xxx 持续集成分支
12. build/xxx 打包分支
13. perf/xxx 性能分支
## 推送代码
- 切换到dist目录
- 切换为 npm 镜像源
- 修改package版本
- npm adduser
- npm publish
## 组件开发流程
- 在`Wy-design/packages/components/`下建立组件
- 在`Wy-design/examples/`下建立测试组件
- 组件开发完成,在 `Wy-design/packages/components/index` 路径下添加相关组件、同时需要在`Wy-design/typings/components.d` 中新增类型,确保组件打包后可以正常识别类型
## 注意
打包时候如遇到`windows is undefined` 则添加判断 `if (!import.meta.env.SSR)`
# Vue3 + VitePress 搭建部署组件库文档平台(结合 Element Plus 与 Arco Design Vue)—— 超详细图文教程
@[toc]
## 简介
[【代码仓库,拉取即用,https://github.com/wuyongGitHub/wuyongGitHub.github.io】](https://github.com/wuyongGitHub/wuyongGitHub.github.io)
其实下面的安装和配置步骤完全可以不用细看,那些只是辅助性的说明文档。你只需要从代码仓库中克隆或下载项目源码,然后在本地简单运行一下,再将代码推送到自己的 `GitHub`仓库,就可以快速搭建并部署一套属于你自己的组件文档平台或知识库系统。整个过程非常简便,无需复杂的配置,开箱即用,特别适合用于展示项目文档、技术笔记或团队知识沉淀。
### 预览效果
[部署后的成品地址:https://wuyonggithub.github.io/](https://wuyonggithub.github.io/)


简易二次封装的按钮组件:

### 本文内容
由于前端组件数量较多,如果没有一个固定的组件库平台进行统一管理,很容易导致组件被遗忘或不清楚如何使用的情况。为了解决这一问题,我将结合自己在企业项目中的实战经验,分享如何利用 `Vue3` 和 `VitePress` 搭建专属的文档站点,打造个性化的知识库平台,并实现对组件库的二次开发与定制化。该方案不仅结构清晰、维护便捷,还能随着组件库的持续演进,同步更新文档内容,真正做到文档与代码协同发展,提升团队协作效率与项目可维护性。
> 1. `VitePress` 安装与配置。
> 2. 组件封装与注册。
> 3. 在 `Markdown` 中使用组件预览。
> 4. 同时引入 `Element Plus` 与`Arco Design Vue`。
> 5. 自动构建 & 部署到 `GitHub Pages`。
> 6. 实际案例演示。
## 详细实现步骤【自用】
下面步骤仅仅做个人搭建向导,如看不懂还挺直接拉取`github`【[https://github.com/wuyongGitHub/wuyongGitHub.github.io](https://github.com/wuyongGitHub/wuyongGitHub.github.io)】仓库代码,根据步骤进行理解配置。
### 第一步、项目目录结构及说明
> MY-VITEPRESS/
├── docs/ # 文档内容(Markdown)
│ └── components/ # 示例页面
│ ├── btn-examples.md
│ └── index.md
├── packages/ # 封装的组件源码
│ ├── components/ # Vue 组件
│ │ └── MyButton.vue
│ ├── directives/
│ ├── examples/ # 使用示例代码
│ └── theme-chalk/ # 样式变量
├── .vitepress/ # VitePress 配置
│ ├── config.ts
│ └── theme/
├── vite.config.ts
└── package.json
注意:docs 是文档入口,packages 是组件源码,两者分离但通过 VitePress 动态绑定。
### 第二步、项目初始化
新建MY-VITEPRESS文件夹
```typescript
mkdir MY-VITEPRESS
cd MY-VITEPRESS
npm init -y
```
### 第三步、安装核心依赖
```typescript
npm install vue@3 vite @vitejs/plugin-vue -D
```
### 第四步、安装 VitePress
`vitepress` 是独立运行的,不依赖 `vite` 项目本身,但可以共存。
```typescript
npm install vitepress -D
```
### 第五步、创建 VitePress 文档站点
创建/docs/index.md,并写入内容
```typescript
---
title: 我的组件库文档
description: 基于 Vue3 + VitePress + Element Plus 的组件库文档
---
# 欢迎使用我的组件库
这是一个基于 Vue3、VitePress 构建的组件库文档平台,集成了 Element Plus 和 Arco Design UI 的功能。
## 快速开始
```vue
点击我
```
在根目录执行`npm run docs:dev`

### 第六步、构建组件库(packages)
1. 创建 `packages` 文件夹,与docs同级目录。

2. 创建 `components/button`,封装你的组件。


3. 创建`packages/components/index.ts`

4. 创建 `packages/directives/domResize.ts`
```typescript
// packages/directives/domResize.ts
import { DirectiveBinding } from 'vue';
export const domResize = {
mounted(el: HTMLElement, binding: DirectiveBinding) {
const resizeHandler = () => {
binding.value?.(el.offsetWidth, el.offsetHeight);
};
window.addEventListener('resize', resizeHandler);
resizeHandler();
},
unmounted(el: HTMLElement) {
window.removeEventListener('resize', () => {});
}
};
```
### 第七步、集成 Element Plus & Arco Design UI
1. 安装 Element Plus,安装 Arco Design Vue
```typescript
npm install element-plus -S
npm install @arco-design/web-vue -S
```
2. 引入样式(在 main.ts 中)
```typescript
import { createApp } from "vue";
import App from "./App.vue";
/* 样式文件 */
import router from "./router";
import { domResize } from "./directives/domResize";
import "./theme-chalk/global.scss";
import ArcoVue from '@arco-design/web-vue';
import ElementPlus from 'element-plus'
import '@arco-design/web-vue/dist/arco.css';
import './styles/element/index.scss'
const app = createApp(App);
app.directive("domResize", domResize);
app.use(ArcoVue);
app.use(ElementPlus)
app.use(router).mount("#app");
```
### 第八步、批量注册组件
创建packages/index.ts文件,内容如下:
```typescript
/*
* @Author: wyk
* @Date: 2025-09-25 09:44:38
* @LastEditTime: 2024-05-24 18:58:39
* @Description:
*/
export * from "./components";
import { installer as install } from "./install";
export default install;
```
将你封装的所有组件进行批量注册,使其能够通过 `app.use()` 的方式全局安装到 `Vue` 应用中。
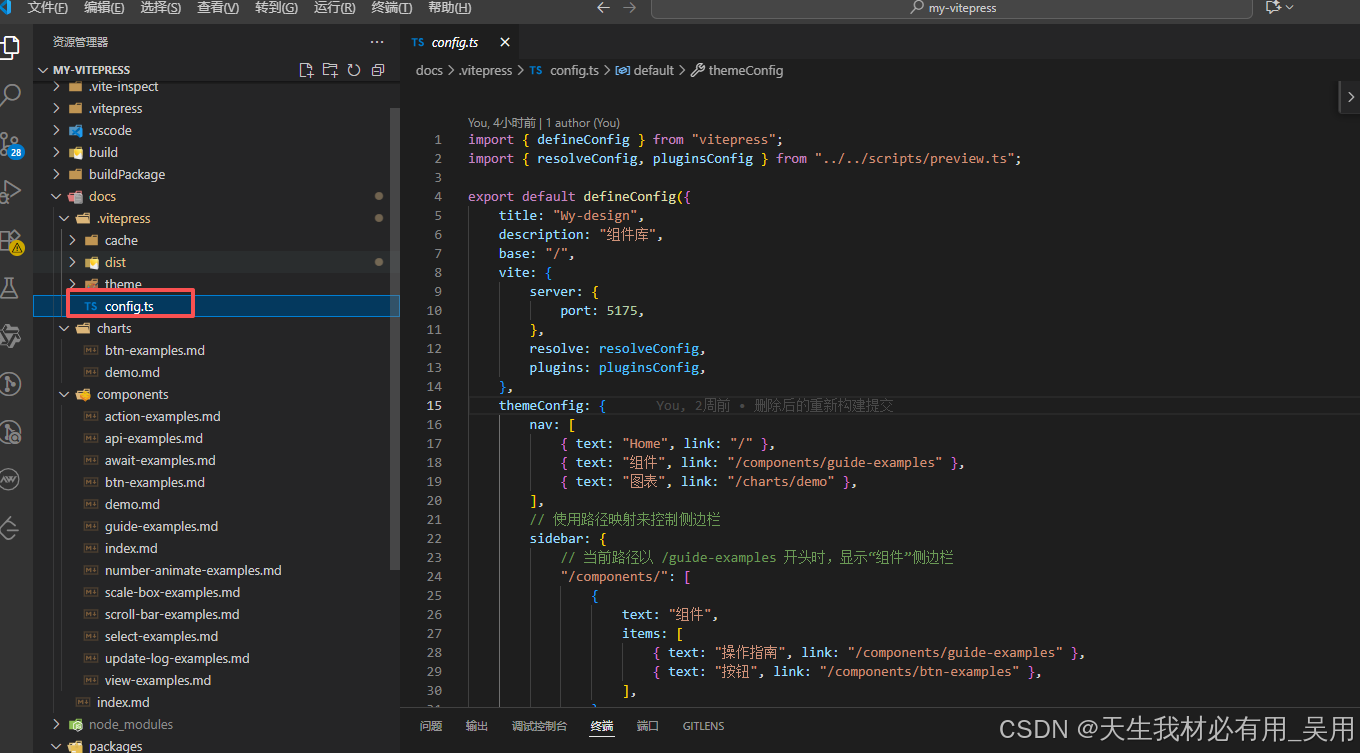
### 第九步、配置 VitePress 主题与组件演示

```typescript
import { defineConfig } from "vitepress";
import { resolveConfig, pluginsConfig } from "../../scripts/preview.ts";
export default defineConfig({
title: "Wy-design",
description: "组件库",
base: "/",
vite: {
server: {
port: 5175,
},
resolve: resolveConfig,
plugins: pluginsConfig,
},
themeConfig: {
nav: [
{ text: "Home", link: "/" },
{ text: "组件", link: "/components/guide-examples" },
{ text: "图表", link: "/charts/demo" },
],
// 使用路径映射来控制侧边栏
sidebar: {
// 当前路径以 /guide-examples 开头时,显示“组件”侧边栏
"/components/": [
{
text: "组件",
items: [
{ text: "操作指南", link: "/components/guide-examples" },
{ text: "按钮", link: "/components/btn-examples" },
],
},
],
// 当前路径以 /demo 开头时,显示“图表”侧边栏
"/charts/": [
{
text: "图表",
items: [{ text: "demo1", link: "/charts/demo" }],
},
],
},
socialLinks: [{ icon: "github", link: "https://github.com/wuyongGitHub/wuyongGitHub.github.io" }],
},
});
```
### 第十步、vitpress使用组件打包配置
新建`docs/.vitepress/theme/index.ts`,引入打包后的dist
```typescript
import Theme from "vitepress/theme";
import { App, h, defineAsyncComponent } from "vue";
import asyncComponents from "@/examples/index";
import { domResize } from "@/directives/domResize";
// 样式
import "element-plus/dist/index.css";
import "@arco-design/web-vue/dist/arco.css";
import "../../../packages/styles/element/index.scss";
// 必须引入并注册组件库
import ElementPlus from "element-plus";
import ArcoVue from "@arco-design/web-vue";
const WyBasicsDocsImage = defineAsyncComponent(() => asyncComponents.then((Components) => Components["WyBasicsDocsImage"]));
export default {
...Theme,
Layout() {
return h(Theme.Layout, null, {
"home-hero-image": () => {
return h(WyBasicsDocsImage);
},
});
},
async enhanceApp({ app }: { app: App }) {
let Components = await asyncComponents;
app.directive("domResize", domResize);
// 注册 UI 库
app.use(ElementPlus);
app.use(ArcoVue);
// 注册你二次封装的组件
for (let i in Components) {
app.use(Components[i]);
}
},
};
```
### 第十一步、本地开发和构建
```typescript
"scripts": {
"start": "vite --host --mode development",
"build": "vue-tsc --noEmit && vite build --mode developmentBuild && node buildPackage/vetur.js && node buildPackage/index.js ",
"preview": "vite preview",
"lint": "eslint . --ext .vue,.ts,.js,.jsx,.mjs --fix --ignore-path .gitignore",
"prettier": "prettier --write .",
"style": "stylelint 'packages/**/*.(css|scss)' --fix",
"prepare": "husky install",
"docs:dev": "vitepress dev docs",
"docs:build": "cross-env NODE_ENV=production vitepress build docs",
"docs:preview": "vitepress preview docs"
},
```
```typescript
npm run start:启动案例使用预览
npm run build:打包组件生成/build/dist目录
npm run docs:dev:启动本地文档预览,热更新
npm run docs:build:构建文档输出静态文件
npm run docs:serve:预览构建结果
```
### 第十二步、打包优化
`vite.config.ts`进行打包优化,排除了 `vue, element-plus` 等大型依赖打包。
```typescript
/*
* @Author: wyk
* @Date: 2022-11-22 10:22:48
* @LastEditTime: 2024-08-30 17:19:06
* @Description:
*/
import { defineConfig } from "vite";
import vue from "@vitejs/plugin-vue";
import { resolve } from "path";
import { pluginsConfig, resolveConfig } from "./scripts/preview";
import Inspect from "vite-plugin-inspect";
import dts from "vite-plugin-dts";
export default defineConfig(() => {
return {
build: {
outDir: "build",
cssCodeSplit: true,
rollupOptions: {
external: ["@ant-design/icons-vue", "ant-design-vue", "element-plus", "unplugin-vue-components", "unplugin-auto-import", "vue"],
output: [
{
format: "es",
entryFileNames: "[name].js",
exports: "named",
name: "JbDesign",
dir: "./build/dist",
},
{
format: "es",
entryFileNames: "[name].js",
exports: "named",
preserveModules: true,
preserveModulesRoot: "packages",
dir: "./build/es",
},
{
format: "cjs",
entryFileNames: "[name].js",
exports: "named",
preserveModules: true,
preserveModulesRoot: "packages",
dir: "./build/lib",
},
],
},
lib: {
entry: resolve(__dirname, "./packages/index.ts"),
name: "JbDesign",
fileName: (format) => `Wy-design.${format}.js`,
formats: ["es", "cjs"],
},
},
plugins: [
vue(),
dts({
tsconfigPath: "./tsconfig.prod.json",
outDir: "build/lib",
}),
dts({
tsconfigPath: "./tsconfig.prod.json",
outDir: "build/es",
}),
...pluginsConfig,
// Inspect({
// build: true,
// outputDir: ".vite-inspect",
// }),
],
resolve: resolveConfig,
};
});
```
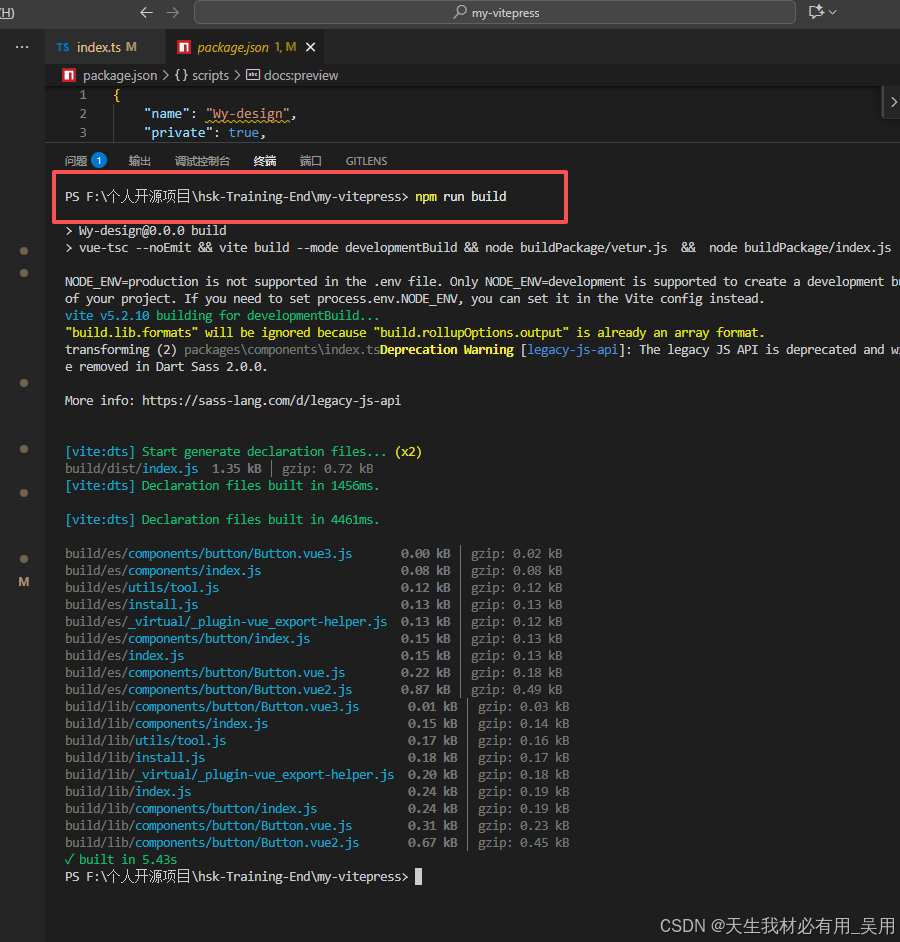
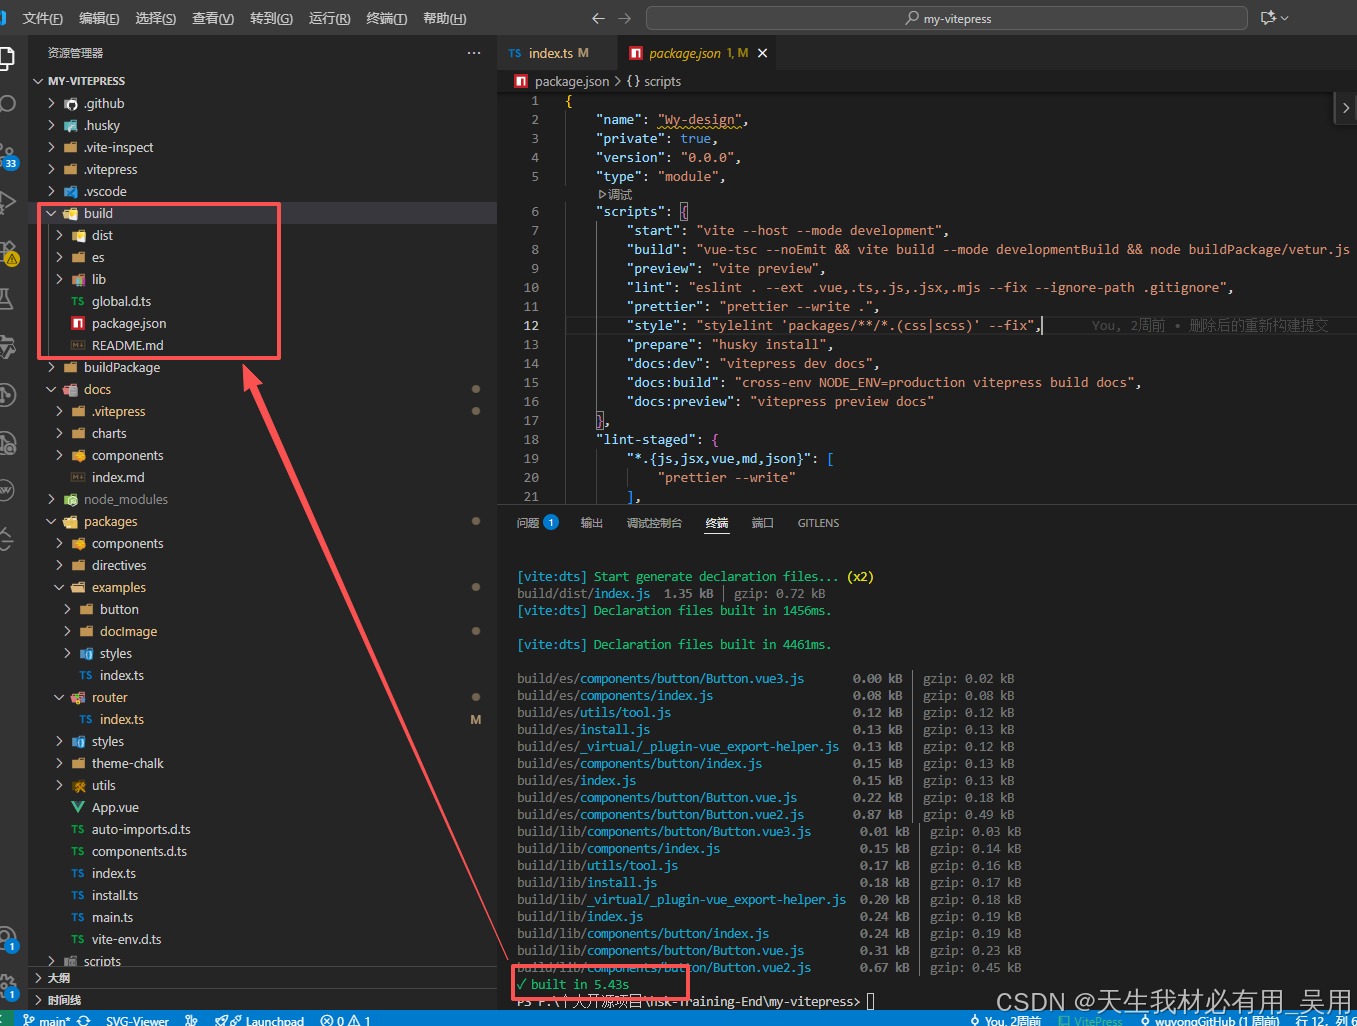
### 第十三步、打包测试
执行`npm run build`命令,进入打包


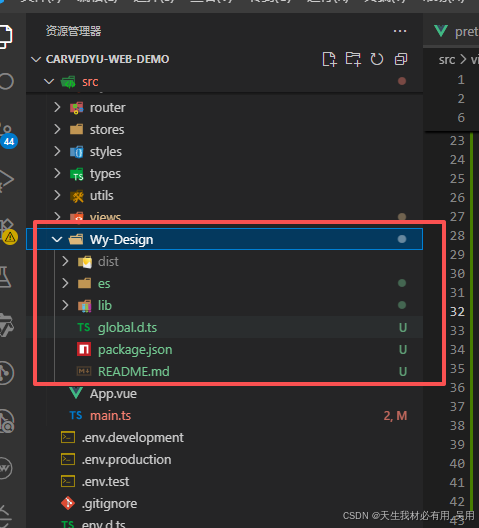
将`build`文件名改成`Wy-Design`,移入需要使用的项目,后期会将该包上传到`npm`服务或者`npm`私服中,通过`install`进行安装拉取使用。

在需要使用该组件包的项目中全局注册使用:
```typescript
import wyDesign from "./Wy-Design/dist/index";
import "./build/dist/index.css";
app.use(wyDesign);
```

或者按需引入
```typescript
import { WyButton } from "../../Wy-Design";
```

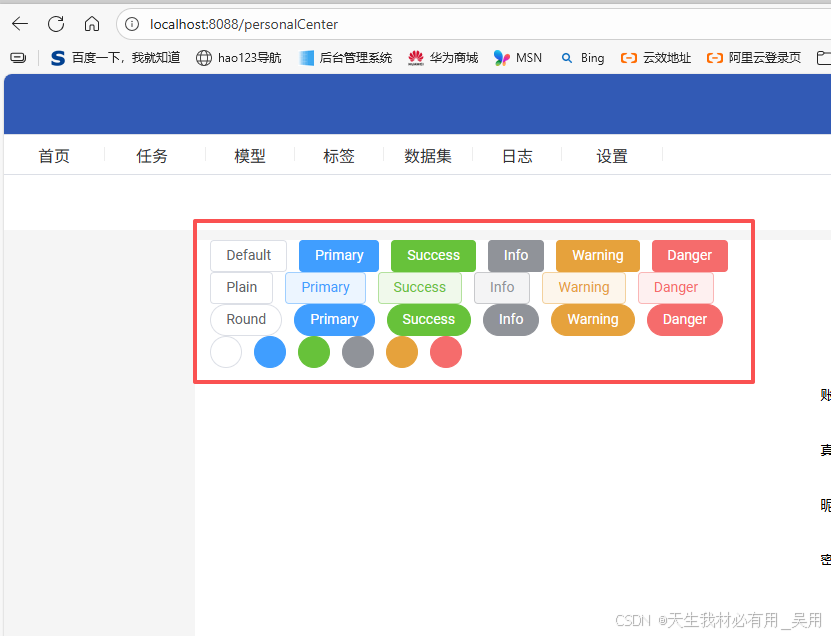
### 第十四步、使用组件
```typescript
Plain
Primary
Success
Info
Warning
Danger
Round
Primary
Success
Info
Warning
Danger
.
.
.
```
### 第十六步、查看使用效果
## 部署到服务器
### 第一步、执行安装基础工具
```powershell
yum -y install make zlib zlib-devel gcc-c++ libtool openssl openssl-devel
```
执行会报错`CentOS 7 `服务器无法访问` mirrorlist.centos.org`,导致 `yum` 无法获取软件包源列表,因此无法安装任何软件(如` Nginx、gcc` 等)。原因在于:`CentOS 7` 已于 `2024年6月30日` 正式停止维护(`End of Life, EOL`)切换到 `vault.centos.org` 或 阿里云镜像源
### 第二步、备份原有 repo 文件
```powershell
cd /etc/yum.repos.d
mv CentOS-Base.repo CentOS-Base.repo.backup
```
### 第三步、创建新的 CentOS-Base.repo
```powershell
cat > CentOS-Base.repo << 'EOF'
[base]
name=CentOS-$releasever - Base
baseurl=https://vault.centos.org/7.9.2009/os/$basearch/
gpgcheck=1
gpgkey=file:///etc/pki/rpm-gpg/RPM-GPG-KEY-CentOS-7
enabled=1
[updates]
name=CentOS-$releasever - Updates
baseurl=https://vault.centos.org/7.9.2009/updates/$basearch/
gpgcheck=1
gpgkey=file:///etc/pki/rpm-gpg/RPM-GPG-KEY-CentOS-7
enabled=1
[extras]
name=CentOS-$releasever - Extras
baseurl=https://vault.centos.org/7.9.2009/extras/$basearch/
gpgcheck=1
gpgkey=file:///etc/pki/rpm-gpg/RPM-GPG-KEY-CentOS-7
enabled=1
[centosplus]
name=CentOS-$releasever - Plus
baseurl=https://vault.centos.org/7.9.2009/centosplus/$basearch/
gpgcheck=1
gpgkey=file:///etc/pki/rpm-gpg/RPM-GPG-KEY-CentOS-7
enabled=0
EOF
```
### 第四步、清理并重建缓存
```powershell
yum clean all
yum makecache
```
### 第五步、安装nginx与wget
```powershell
yum -y install wget
yum -y install nginx
```
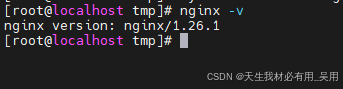
### 第六步、验证是否成功
```powershell
# 查看nginx版本
nginx -v
# 查看可用仓库
yum repolist
# 启动 Nginx
systemctl start nginx
systemctl enable nginx
# 查看 Nginx 是否运行
systemctl status nginx
```
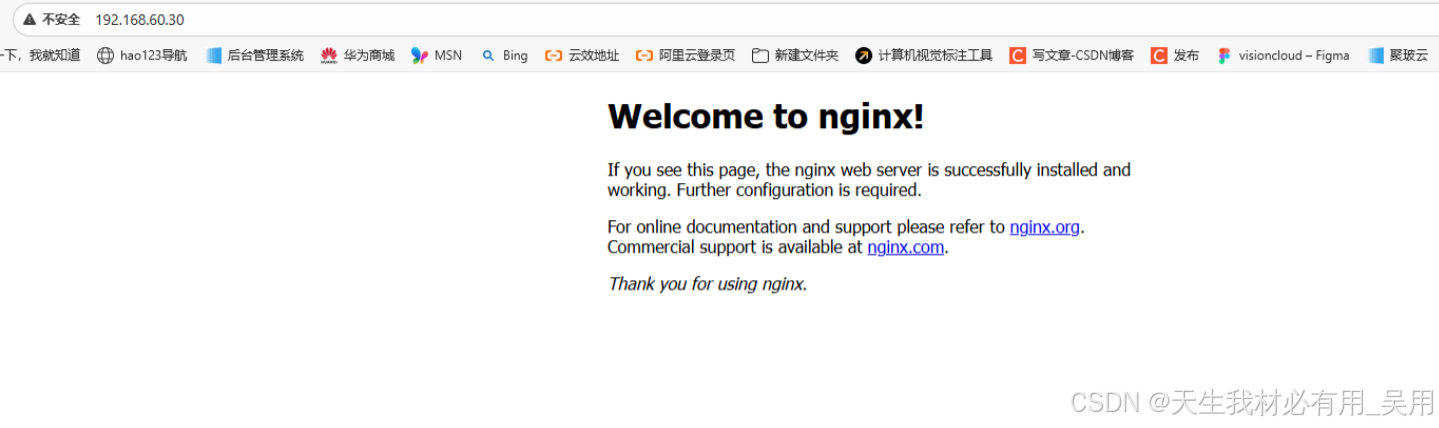
### 第七步、访问你的服务器 IP
成功访问:
### 第八步、解决访问不成功问题命令(可访问即跳过这一步)
#### 第一步、检查当前防火墙
```powershell
firewall-cmd --list-all
```
看输出中是否有:
```powershell
ports: 80/tcp
```
#### 第二步、添加 80 端口(永久生效)
```powershell
firewall-cmd --add-port=80/tcp --permanent
firewall-cmd --reload
```
#### 第三步、再次检查当前防火墙
```powershell
firewall-cmd --list-ports
```
#### 第四步、重启nginx
```powershell
systemctl restart nginx
```
#### 第五步、浏览器访问
```powershell
http://192.168.60.30:80
```
#### 第七步、查看效果

### 第九步、进行vitepress打包
```powershell
npm run docs:build
```
生成打包目录,只需要`dist`文件即可
### 第十步、创建tmp文件夹
```powershell
mkdir /tmp
```
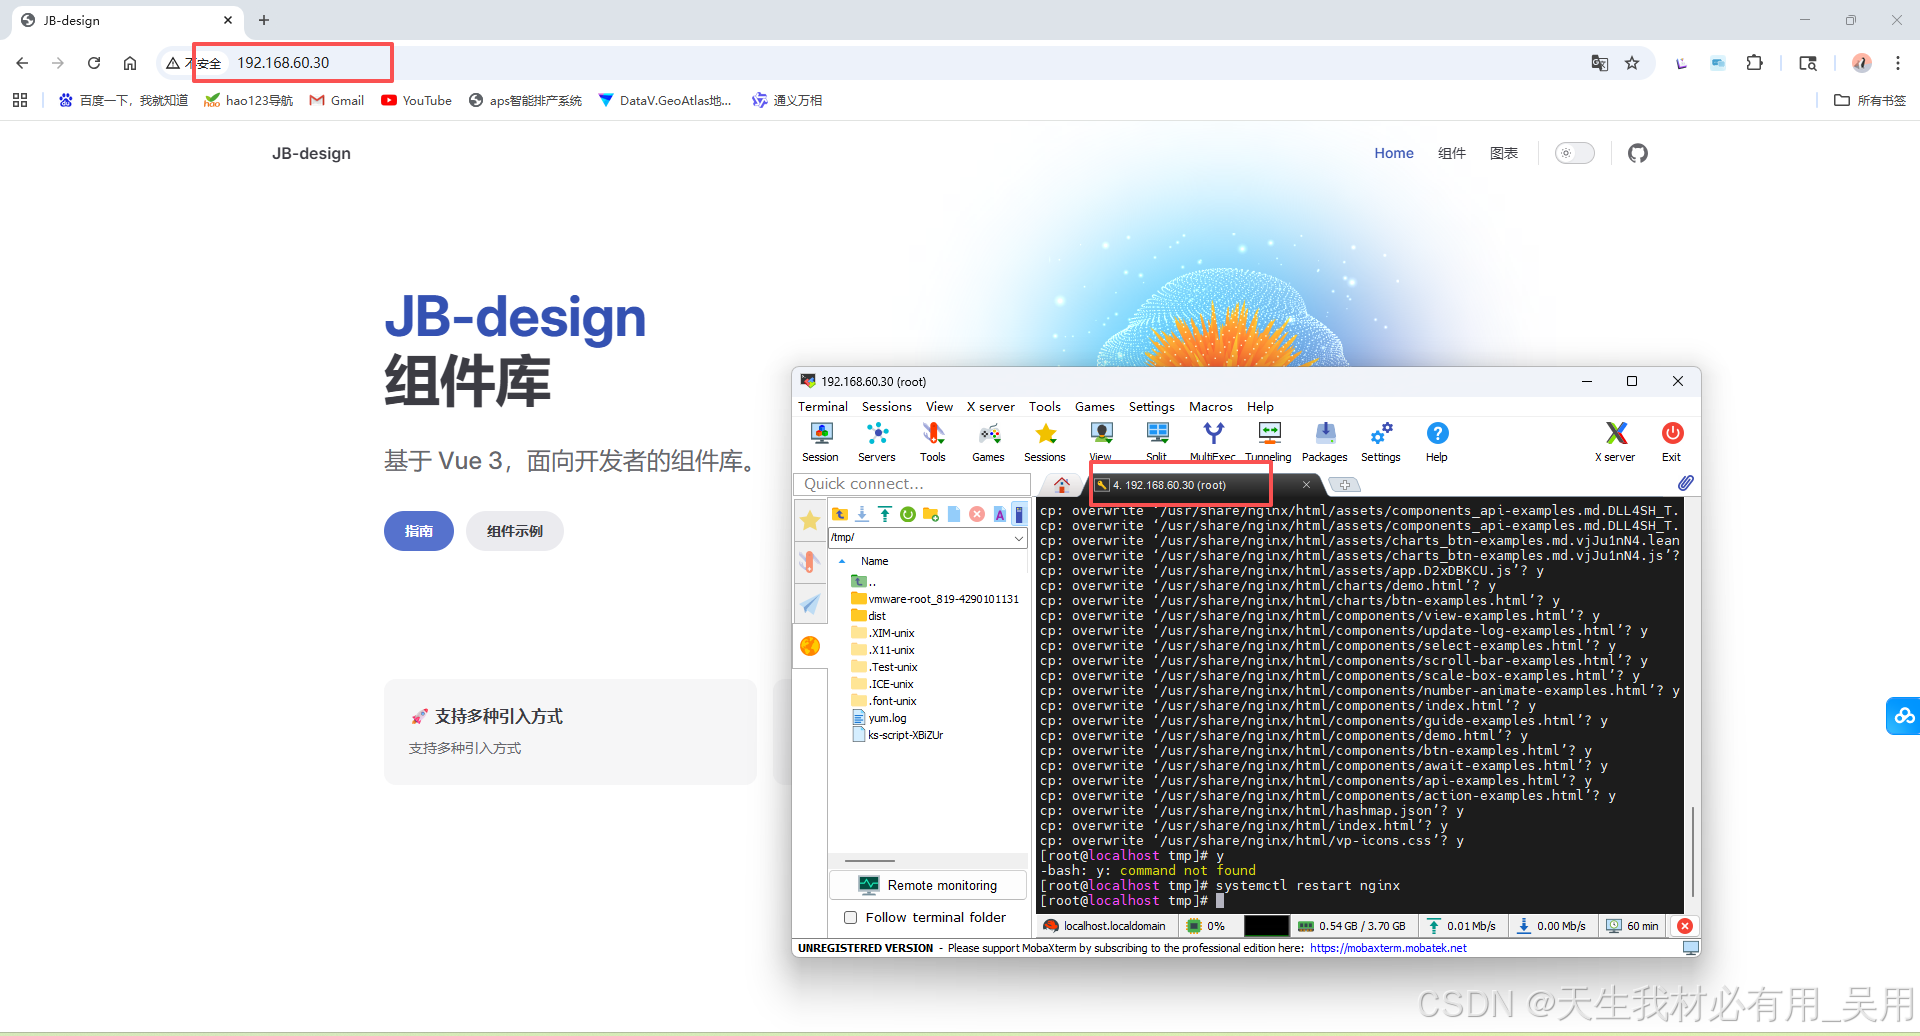
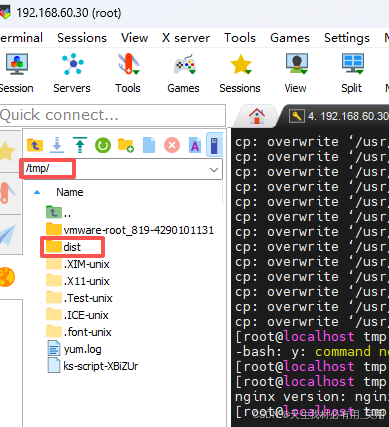
### 第十一步、将dist文件传入tmp文件夹
我使用的是`MobaXterm`进行远程传输的,很方便,直接拖拽即可。

### 第十二步、复制dist文件到 Nginx 根目录
```powershell
cp -r /tmp/dist/* /usr/share/nginx/html/
```
### 第十三步、重启 Nginx
```powershell
systemctl restart nginx
```
### 第十四步、访问部署的vitpress
```powershell
http://192.168.60.30
```

## VitePress部署到GitHub Pages
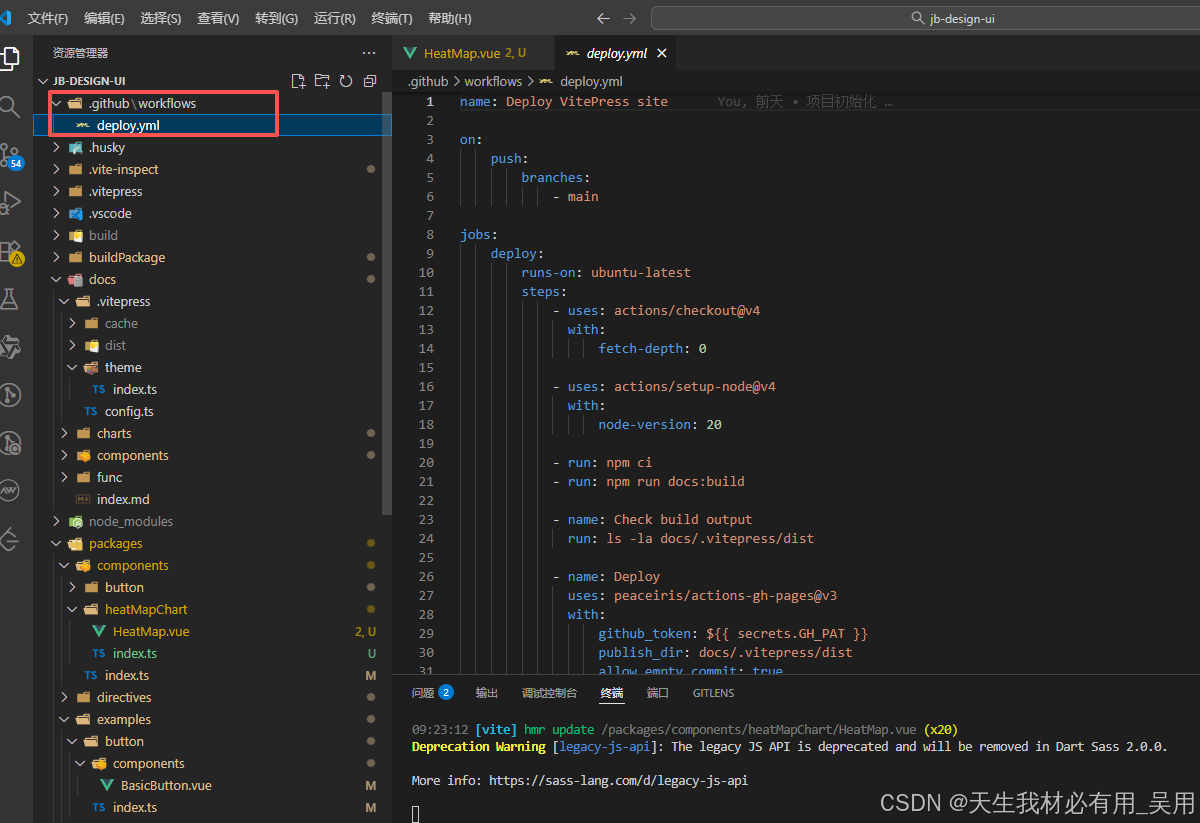
### 第一步、创建 .github/workflows/deploy.yml 文件
```powershell
name: Deploy VitePress site
on:
push:
branches:
- main
jobs:
deploy:
runs-on: ubuntu-latest
steps:
- uses: actions/checkout@v4
with:
fetch-depth: 0
- uses: actions/setup-node@v4
with:
node-version: 20
- run: npm ci
- run: npm run docs:build
- name: Check build output
run: ls -la docs/.vitepress/dist
- name: Deploy
uses: peaceiris/actions-gh-pages@v3
with:
github_token: ${{ secrets.GH_PAT }}
publish_dir: docs/.vitepress/dist
allow_empty_commit: true
force_orphan: true
publish_branch: gh-pages
keep_files: false
enable_jekyll: false
```
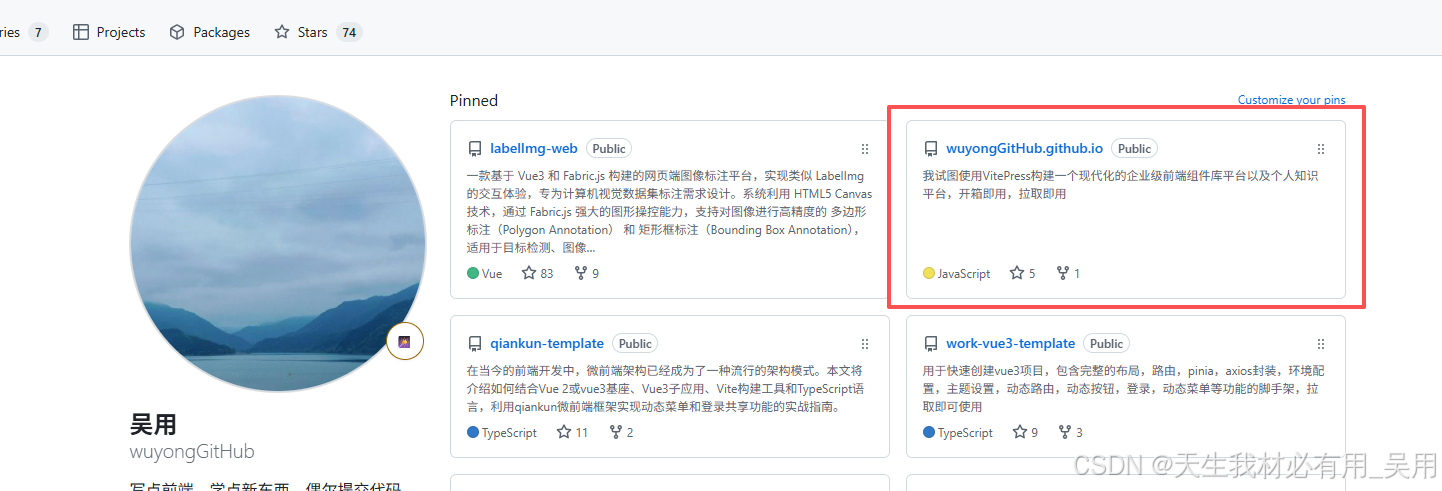
### 第二步、创建github仓库
创建一个github仓库,命名为` wuyongGitHub.github.io`
### 第三步、上传代码
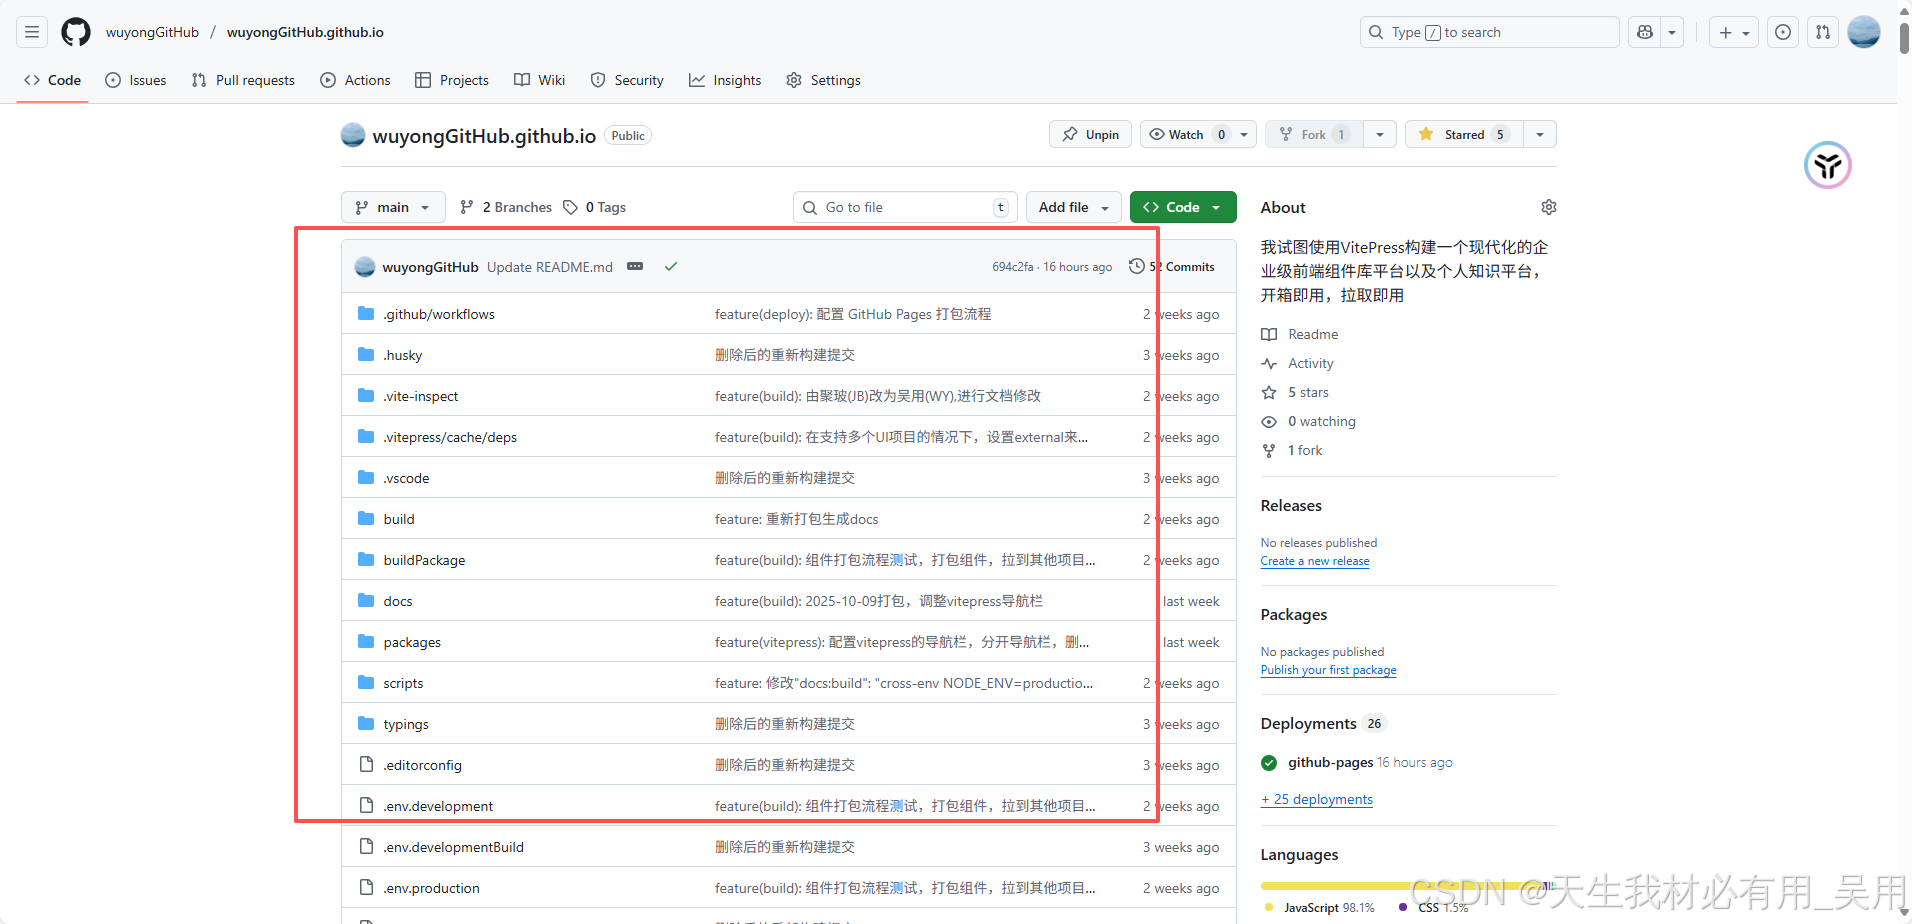
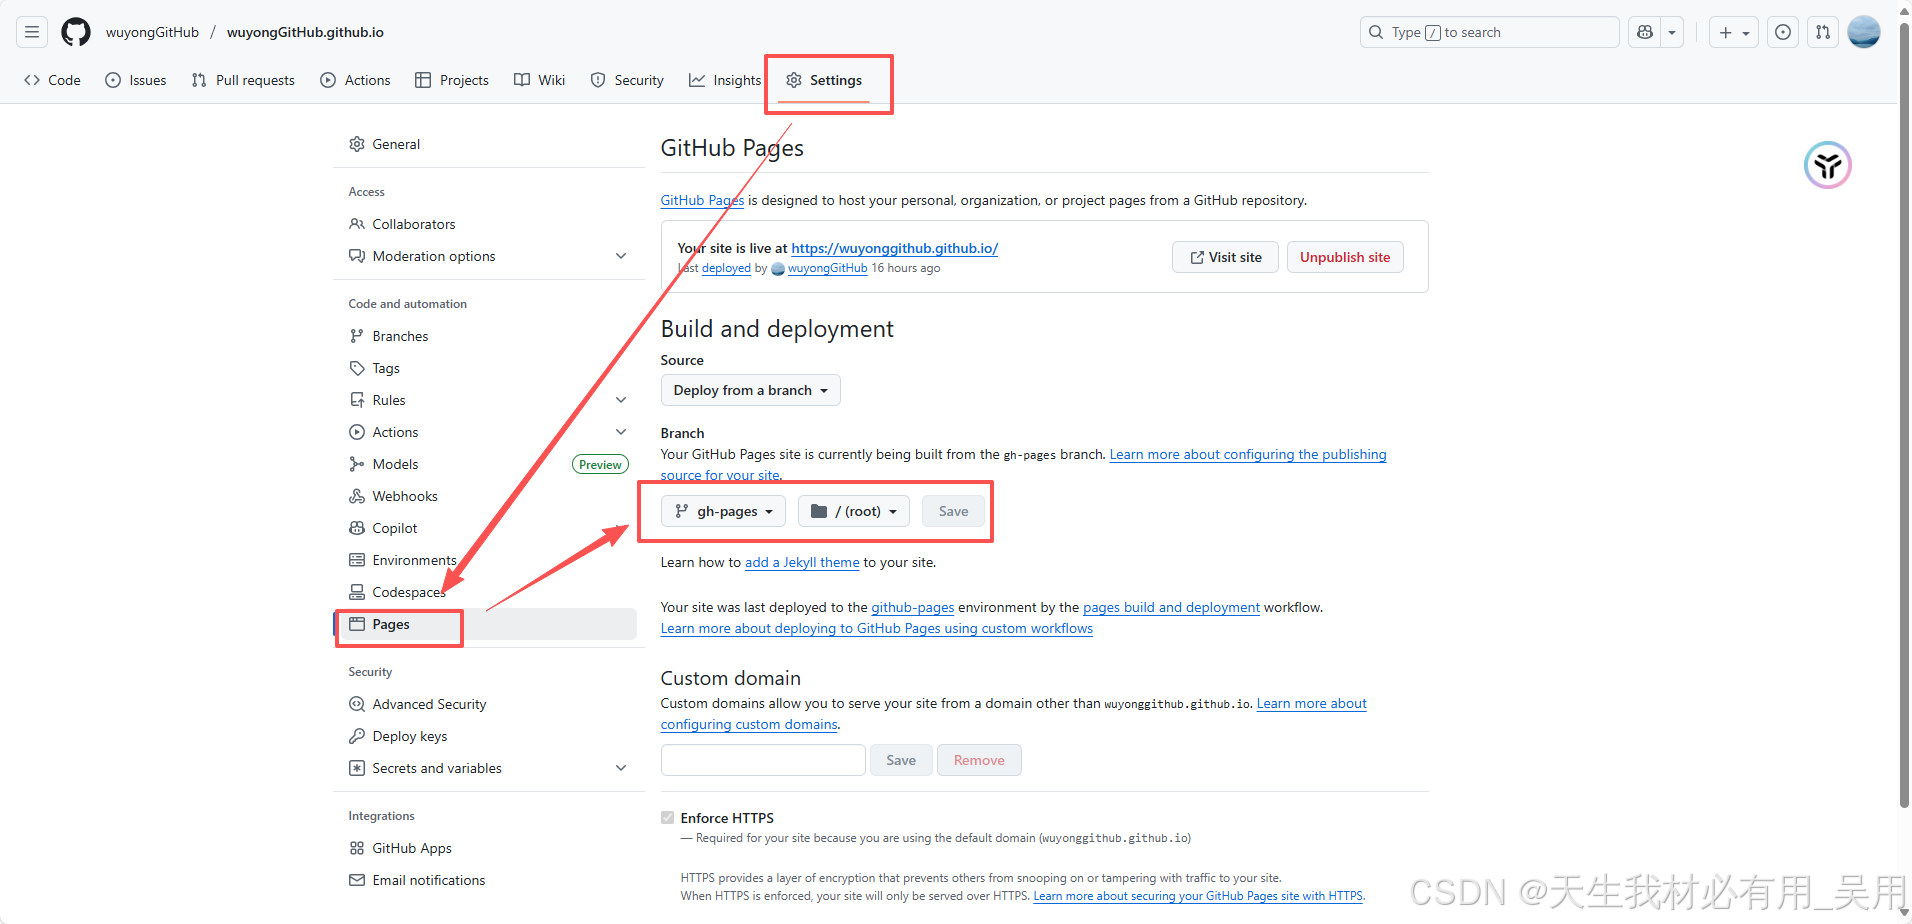
### 第四步、启用 GitHub Pages
进入你的`GitHub`仓库 → `Settings` → `Pages`
在 `Source` 部分:
`Branch: `选择 `gh-pages`(或 `main`)
`Folder: `选择 `/ (root)`(如果是 `gh-pages`)或`/docs`(如果推到`main`的 `docs` 目录)
点击 `Save`,等待 `1-2` 分钟,页面会显示部署成功的 `URL`,如:
> https://.github.io
> https://.github.io/
### 第五步、访问你的站点
部署成功后,访问:
`https://.github.io`(如果是` .github.io `仓库)
`https://.github.io/`(其他仓库)
部署到githubPage后,通过【[https://wuyonggithub.github.io/](https://wuyonggithub.github.io/)】地址就可以访问我的页面 欢迎访问~
### 完结~