# ddddocr
**Repository Path**: liveup_admin/ddddocr
## Basic Information
- **Project Name**: ddddocr
- **Description**: No description available
- **Primary Language**: Unknown
- **License**: MIT
- **Default Branch**: master
- **Homepage**: None
- **GVP Project**: No
## Statistics
- **Stars**: 0
- **Forks**: 0
- **Created**: 2026-01-31
- **Last Updated**: 2026-01-31
## Categories & Tags
**Categories**: Uncategorized
**Tags**: None
## README
# DdddOcr - 通用验证码识别SDK

一个简单易用的通用验证码识别Python库
## 目录
- [赞助合作商](#赞助合作商)
- [项目介绍](#项目介绍)
- [环境支持](#环境支持)
- [安装方法](#安装方法)
- [功能概览](#功能概览)
- [初始化参数详解](#初始化参数详解)
- [参数详细说明](#参数详细说明)
- [功能组合与冲突](#功能组合与冲突)
- [模型选择指南](#模型选择指南)
- [性能优化参数](#性能优化参数)
- [详细使用说明](#详细使用说明)
- [文字识别功能](#文字识别功能)
- [基础OCR识别](#基础ocr识别)
- [OCR概率输出](#ocr概率输出)
- [自定义字符范围](#自定义字符范围)
- [颜色过滤功能](#颜色过滤功能)
- [目标检测功能](#目标检测功能)
- [滑块验证码处理](#滑块验证码处理)
- [算法1:边缘匹配](#算法1边缘匹配)
- [算法2:图像差异比较](#算法2图像差异比较)
- [自定义模型导入](#自定义模型导入)
- [高级用法](#高级用法)
- [批量处理](#批量处理)
- [多线程优化](#多线程优化)
- [验证码预处理](#验证码预处理)
- [常见问题](#常见问题)
- [初始化速度慢](#初始化速度慢)
- [识别准确率不高](#识别准确率不高)
- [GPU加速](#gpu加速)
- [处理复杂验证码](#如何处理复杂验证码)
- [内存占用过高](#内存占用过高)
- [参数冲突问题](#参数冲突问题)
- [支持的图片格式](#支持的图片格式)
- [多线程并发问题](#多线程并发问题)
- [项目技术支持](#项目技术支持)
- [使用示例](#使用示例)
- [许可证](#许可证)
## 赞助合作商
| | 赞助合作商 | 推荐理由 |
|------------------------------------------------------------|------------|--------------------------------------------------------------------------------------------------|
|  | [YesCaptcha](https://yescaptcha.com/i/NSwk7i) | 谷歌reCaptcha验证码 / hCaptcha验证码 / funCaptcha验证码商业级识别接口 [点我](https://yescaptcha.com/i/NSwk7i) 直达VIP4 |
|  | [超级鹰](https://www.chaojiying.com/) | 全球领先的智能图片分类及识别商家,安全、准确、高效、稳定、开放,强大的技术及校验团队,支持大并发。7*24h作业进度管理 |
|  | [Malenia](https://malenia.iinti.cn/malenia-doc/) | Malenia企业级代理IP网关平台/代理IP分销软件 |
| 雨云VPS | [注册首月5折](https://www.rainyun.com/ddddocr_) | 浙江节点低价大带宽,100M每月30元 |
## 项目介绍
DdddOcr 是一个通用验证码离线本地识别SDK,由 [sml2h3](https://github.com/sml2h3) 与 [kerlomz](https://github.com/kerlomz) 共同开发完成。该项目通过大批量生成随机数据进行深度网络训练,可以识别各种类型的验证码,包括:
- 常见的数字字母组合验证码
- 中文验证码
- 滑块验证码
- 各种特殊字符验证码
项目设计理念是"最简依赖",尽量减少用户的配置和使用成本,提供简单易用的API接口。
## 环境支持
| 系统 | CPU | GPU | 最大支持Python版本 | 备注 |
|-----|-----|-----|--------------|-----|
| Windows 64位 | ✓ | ✓ | 3.12 | 部分版本Windows需要安装[vc运行库](https://www.ghxi.com/yxkhj.html) |
| Linux 64 / ARM64 | ✓ | ✓ | 3.12 | |
| macOS X64 | ✓ | ✓ | 3.12 | M1/M2/M3芯片用户请参考[相关说明](https://github.com/sml2h3/ddddocr/issues/67) |
不支持的环境:
- Windows 32位
- Linux 32位
## 安装方法
### 从PyPI安装(推荐)
```bash
pip install ddddocr
```
### 从源码安装
```bash
git clone https://github.com/sml2h3/ddddocr.git
cd ddddocr
pip install .
```
### 安装 API 依赖(可选)
```bash
pip install ".[api]"
```
> **注意**:请勿直接在ddddocr项目的根目录内直接import ddddocr,请确保你的开发项目目录名称不为ddddocr。
## 功能概览
DdddOcr提供以下核心功能:
| 功能 | 描述 | 初始化参数 |
|-----|-----|----------|
| 文字识别 | 识别图片中的文字内容 | `ocr=True`(默认) |
| 目标检测 | 检测图片中的目标位置 | `det=True` |
| 滑块验证码识别 | 识别滑块验证码的缺口位置 | `ocr=False` |
| 自定义模型导入 | 导入自定义训练的模型 | `import_onnx_path="模型路径"` |
## 初始化参数详解
`DdddOcr` 类初始化时支持多种参数配置,以适应不同的使用场景:
```python
ddddocr.DdddOcr(
ocr=True, # 是否启用OCR功能
det=False, # 是否启用目标检测功能
old=False, # 是否使用旧版OCR模型
beta=False, # 是否使用Beta版OCR模型(新模型)
use_gpu=False, # 是否使用GPU加速
device_id=0, # 使用的GPU设备ID
show_ad=True, # 是否显示广告信息
import_onnx_path="", # 自定义模型路径
charsets_path="", # 自定义字符集路径
max_image_bytes=None, # 单图最大字节数(默认 8MB)
max_image_side=None # 单图最长边限制(默认 4096px)
)
```
### 参数详细说明
| 参数 | 类型 | 默认值 | 说明 |
|-----|-----|-----|-----|
| `ocr` | bool | True | 是否启用OCR功能,用于识别图片中的文字。**互斥性**:当`det=True`时会强制关闭OCR |
| `det` | bool | False | 是否启用目标检测功能,用于检测图片中的目标位置。**互斥性**:`det=True`会覆盖`ocr=True` |
| `old` | bool | False | 兼容参数,当前不会改变模型选择(默认即使用旧版模型) |
| `beta` | bool | False | 是否使用Beta版OCR模型(新模型),对某些验证码识别效果更好。**互斥性**:与`old=True`参数互斥(但`old`当前不生效) |
| `use_gpu` | bool | False | 是否使用GPU加速。**依赖关系**:需要安装CUDA和相应的onnxruntime-gpu版本,否则会初始化失败 |
| `device_id` | int | 0 | 使用的GPU设备ID。**依赖关系**:仅在`use_gpu=True`时生效,指定使用哪个GPU设备 |
| `show_ad` | bool | True | 是否在初始化时显示广告信息 |
| `import_onnx_path` | str | "" | 自定义模型的onnx文件路径。**依赖关系**:设置此参数时,`charsets_path`参数必须同时提供;此时`ocr/det`设置会被忽略 |
| `charsets_path` | str | "" | 自定义字符集的json文件路径。**依赖关系**:必须与`import_onnx_path`一起使用,否则无效 |
| `max_image_bytes` | int/str | 8MB | 单图最大字节数上限(入参可为 int 或数字字符串) |
| `max_image_side` | int/str | 4096 | 单图最长边像素上限(入参可为 int 或数字字符串) |
### 功能组合与冲突
根据参数组合,ddddocr具有不同的工作模式:
1. **标准OCR模式**:
- 参数设置:`ocr=True, det=False`(默认)
- 功能:识别图片中的文字
2. **目标检测模式**:
- 参数设置:`ocr=False, det=True`
- 功能:检测图片中的目标位置
- 注意:同时设置`ocr=True, det=True`时,会进入目标检测模式(`det`优先)
3. **滑块识别模式**:
- 参数设置:`ocr=False, det=False`
- 功能:使用滑块匹配算法(需调用`slide_match`或`slide_comparison`方法)
4. **自定义模型模式**:
- 参数设置:`import_onnx_path="模型路径", charsets_path="字符集路径"`
- 功能:使用自定义训练的模型进行识别
- 注意:设置此模式时,`ocr`和`det`参数会被忽略,且自定义字符集文件需包含 `charset/word/image/channel` 字段
5. **OCR模型选择**:
- 默认模型:不设置特殊参数(当前使用 `common_old.onnx`)
- Beta模型:`beta=True`(使用 `common.onnx`)
- 旧版模型参数:`old=True`(当前不改变模型,仅为兼容保留)
- 注意:`beta`和`old`参数互斥,但`old`当前不生效
### 模型选择指南
- **默认模型**:当前默认使用 `common_old.onnx`,适用于多数简单验证码场景
- **Beta模型**:`beta=True` 使用 `common.onnx`,对部分复杂验证码效果更好
- **自定义模型**:当默认模型无法满足需求时,可以通过[dddd_trainer](https://github.com/sml2h3/dddd_trainer)训练自己的模型
### 性能优化参数
- **GPU加速**:对于处理大量图片时,开启GPU加速可显著提升性能
```python
ocr = ddddocr.DdddOcr(use_gpu=True, device_id=0)
```
- **GPU设备选择**:在多GPU环境中,可通过`device_id`指定使用的GPU
```python
# 使用第二张GPU卡
ocr = ddddocr.DdddOcr(use_gpu=True, device_id=1)
```
- **关闭广告显示**:在生产环境中可关闭广告提示
```python
ocr = ddddocr.DdddOcr(show_ad=False)
```
## 详细使用说明
### 文字识别功能
#### 基础OCR识别
主要用于识别单行文字,如常见的英数验证码等。支持中文、英文、数字以及部分特殊字符的识别。
```python
import ddddocr
# 初始化OCR对象
ocr = ddddocr.DdddOcr()
# 读取图片
with open("验证码图片.jpg", "rb") as f:
image = f.read()
# 识别图片
result = ocr.classification(image)
print(result) # 输出识别结果
```
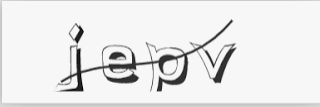
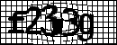
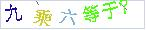
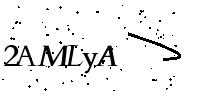
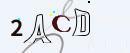
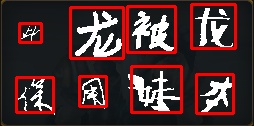
**OCR识别示例图片**
**参考例图**
包括且不限于以下图片


 **OCR模型选择**
DdddOcr内置两套OCR模型,可以通过`beta`参数切换:
```python
# 使用第二套OCR模型
ocr = ddddocr.DdddOcr(beta=True)
```
**透明PNG图片处理**
对于透明黑色PNG图片,可以使用`png_fix`参数(对所有 OCR 模式生效):
```python
result = ocr.classification(image, png_fix=True)
```
> **注意**:`png_fix` 仅对带透明通道的图片生效;初始化DdddOcr对象只需要一次,不要在每次识别时都重新初始化,这会导致速度变慢。
#### OCR概率输出
可以获取OCR识别结果的概率分布,便于进行更灵活的结果处理:
```python
import ddddocr
ocr = ddddocr.DdddOcr()
image = open("test.jpg", "rb").read()
# 获取识别结果的概率分布
result = ocr.classification(image, probability=True)
# 处理概率结果
s = ""
for i in result['probability']:
s += result['charsets'][i.index(max(i))]
print(s)
```
**概率输出示例**(仅对内置模型生效,自定义模型会忽略`probability=True`并直接返回字符串):
```python
# 概率输出结果示例
{
'charsets': ['', '0', '1', '2', '3', '4', '5', '6', '7', '8', '9', 'A', 'B', 'C', ...],
'probability': [
[0.01, 0.02, 0.01, 0.03, 0.02, 0.01, 0.02, 0.75, 0.03, 0.05, 0.01, ...], # 第一个字符的概率分布
[0.01, 0.01, 0.02, 0.01, 0.03, 0.02, 0.01, 0.02, 0.01, 0.80, 0.01, ...], # 第二个字符的概率分布
...
]
}
```
#### 自定义字符范围
可以通过`set_ranges`方法限定OCR识别的字符范围:
```python
import ddddocr
ocr = ddddocr.DdddOcr()
image = open("test.jpg", "rb").read()
# 设置识别范围为数字
ocr.set_ranges(0) # 等同于 ocr.set_ranges("0123456789")
# 或自定义字符范围
ocr.set_ranges("0123456789+-x/=")
result = ocr.classification(image)
print(result)
```
**内置字符范围参数**:
| 参数值 | 含义 |
|-----|-----|
| 0 | 纯数字 0-9 |
| 1 | 纯小写英文 a-z |
| 2 | 纯大写英文 A-Z |
| 3 | 小写英文 + 大写英文 |
| 4 | 小写英文 + 数字 |
| 5 | 大写英文 + 数字 |
| 6 | 小写英文 + 大写英文 + 数字 |
| 7 | 默认字符库 - 小写英文 - 大写英文 - 数字 |
#### 颜色过滤功能
对于一些特殊的验证码,可以通过颜色过滤来提高识别准确率:
```python
import ddddocr
ocr = ddddocr.DdddOcr()
image = open("test.jpg", "rb").read()
# 只保留红色和蓝色部分
result = ocr.classification(image, colors=["red", "blue"])
print(result)
```
**支持的颜色**:
- red (红色)
- green (绿色)
- blue (蓝色)
- yellow (黄色)
- orange (橙色)
- purple (紫色)
- pink (粉色)
- brown (棕色)
也可以自定义颜色范围:
```python
# 自定义颜色范围
custom_ranges = {
'light_blue': [(90, 30, 30), (110, 255, 255)] # HSV颜色空间
}
result = ocr.classification(image, colors=["light_blue"], custom_color_ranges=custom_ranges)
```
> **提示**:`custom_color_ranges` 只有在 `colors` 列表包含对应键名时才会生效。
### 目标检测功能
用于检测图像中可能的目标主体位置,返回目标的边界框坐标:
```python
import ddddocr
import cv2
# 初始化检测对象
det = ddddocr.DdddOcr(det=True, ocr=False)
# 读取图片
with open("test.jpg", 'rb') as f:
image = f.read()
# 检测目标
bboxes = det.detection(image)
print(bboxes) # 输出格式:[[x1, y1, x2, y2], ...]
# 可视化检测结果
im = cv2.imread("test.jpg")
for bbox in bboxes:
x1, y1, x2, y2 = bbox
im = cv2.rectangle(im, (x1, y1), (x2, y2), color=(0, 0, 255), thickness=2)
cv2.imwrite("result.jpg", im)
```
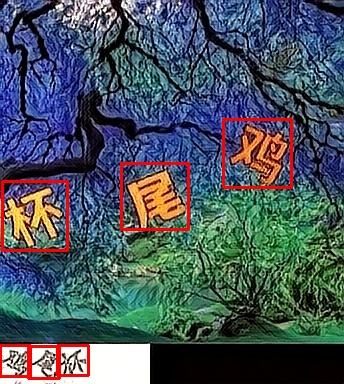
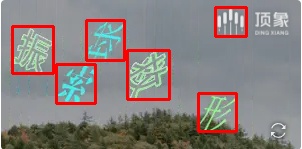
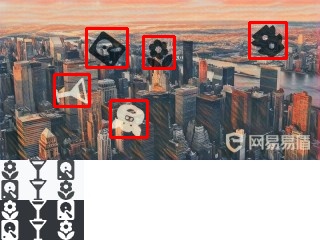
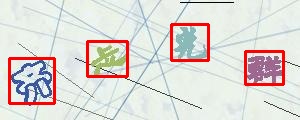
**目标检测示例**:
**参考例图**
包括且不限于以下图片
**OCR模型选择**
DdddOcr内置两套OCR模型,可以通过`beta`参数切换:
```python
# 使用第二套OCR模型
ocr = ddddocr.DdddOcr(beta=True)
```
**透明PNG图片处理**
对于透明黑色PNG图片,可以使用`png_fix`参数(对所有 OCR 模式生效):
```python
result = ocr.classification(image, png_fix=True)
```
> **注意**:`png_fix` 仅对带透明通道的图片生效;初始化DdddOcr对象只需要一次,不要在每次识别时都重新初始化,这会导致速度变慢。
#### OCR概率输出
可以获取OCR识别结果的概率分布,便于进行更灵活的结果处理:
```python
import ddddocr
ocr = ddddocr.DdddOcr()
image = open("test.jpg", "rb").read()
# 获取识别结果的概率分布
result = ocr.classification(image, probability=True)
# 处理概率结果
s = ""
for i in result['probability']:
s += result['charsets'][i.index(max(i))]
print(s)
```
**概率输出示例**(仅对内置模型生效,自定义模型会忽略`probability=True`并直接返回字符串):
```python
# 概率输出结果示例
{
'charsets': ['', '0', '1', '2', '3', '4', '5', '6', '7', '8', '9', 'A', 'B', 'C', ...],
'probability': [
[0.01, 0.02, 0.01, 0.03, 0.02, 0.01, 0.02, 0.75, 0.03, 0.05, 0.01, ...], # 第一个字符的概率分布
[0.01, 0.01, 0.02, 0.01, 0.03, 0.02, 0.01, 0.02, 0.01, 0.80, 0.01, ...], # 第二个字符的概率分布
...
]
}
```
#### 自定义字符范围
可以通过`set_ranges`方法限定OCR识别的字符范围:
```python
import ddddocr
ocr = ddddocr.DdddOcr()
image = open("test.jpg", "rb").read()
# 设置识别范围为数字
ocr.set_ranges(0) # 等同于 ocr.set_ranges("0123456789")
# 或自定义字符范围
ocr.set_ranges("0123456789+-x/=")
result = ocr.classification(image)
print(result)
```
**内置字符范围参数**:
| 参数值 | 含义 |
|-----|-----|
| 0 | 纯数字 0-9 |
| 1 | 纯小写英文 a-z |
| 2 | 纯大写英文 A-Z |
| 3 | 小写英文 + 大写英文 |
| 4 | 小写英文 + 数字 |
| 5 | 大写英文 + 数字 |
| 6 | 小写英文 + 大写英文 + 数字 |
| 7 | 默认字符库 - 小写英文 - 大写英文 - 数字 |
#### 颜色过滤功能
对于一些特殊的验证码,可以通过颜色过滤来提高识别准确率:
```python
import ddddocr
ocr = ddddocr.DdddOcr()
image = open("test.jpg", "rb").read()
# 只保留红色和蓝色部分
result = ocr.classification(image, colors=["red", "blue"])
print(result)
```
**支持的颜色**:
- red (红色)
- green (绿色)
- blue (蓝色)
- yellow (黄色)
- orange (橙色)
- purple (紫色)
- pink (粉色)
- brown (棕色)
也可以自定义颜色范围:
```python
# 自定义颜色范围
custom_ranges = {
'light_blue': [(90, 30, 30), (110, 255, 255)] # HSV颜色空间
}
result = ocr.classification(image, colors=["light_blue"], custom_color_ranges=custom_ranges)
```
> **提示**:`custom_color_ranges` 只有在 `colors` 列表包含对应键名时才会生效。
### 目标检测功能
用于检测图像中可能的目标主体位置,返回目标的边界框坐标:
```python
import ddddocr
import cv2
# 初始化检测对象
det = ddddocr.DdddOcr(det=True, ocr=False)
# 读取图片
with open("test.jpg", 'rb') as f:
image = f.read()
# 检测目标
bboxes = det.detection(image)
print(bboxes) # 输出格式:[[x1, y1, x2, y2], ...]
# 可视化检测结果
im = cv2.imread("test.jpg")
for bbox in bboxes:
x1, y1, x2, y2 = bbox
im = cv2.rectangle(im, (x1, y1), (x2, y2), color=(0, 0, 255), thickness=2)
cv2.imwrite("result.jpg", im)
```
**目标检测示例**:
**参考例图**
包括且不限于以下图片

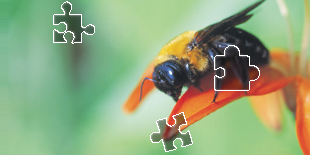
 ### 滑块验证码处理
DdddOcr提供两种滑块验证码处理算法:
#### 算法1:边缘匹配
适用于有透明背景的滑块图片,通过边缘检测找到滑块在背景图中的位置:
```python
import ddddocr
# 初始化滑块检测对象
slide = ddddocr.DdddOcr(det=False, ocr=False)
# 读取滑块图和背景图
with open('target.png', 'rb') as f:
target_bytes = f.read()
with open('background.png', 'rb') as f:
background_bytes = f.read()
# 匹配位置
res = slide.slide_match(target_bytes, background_bytes)
print(f"滑块位置: {res}")
# 可视化结果
background = cv2.imdecode(np.frombuffer(background_bytes, np.uint8), cv2.IMREAD_COLOR)
x1, y1, x2, y2 = res["target"]
# 在背景图上绘制匹配位置
cv2.rectangle(background, (x1, y1), (x2, y2), (0, 255, 0), 2)
# 显示结果
plt.figure(figsize=(10, 6))
plt.imshow(cv2.cvtColor(background, cv2.COLOR_BGR2RGB))
plt.title("滑块匹配结果")
plt.axis('off')
plt.savefig("slide_result.jpg")
plt.show()
```
**滑块匹配示例**:
### 滑块验证码处理
DdddOcr提供两种滑块验证码处理算法:
#### 算法1:边缘匹配
适用于有透明背景的滑块图片,通过边缘检测找到滑块在背景图中的位置:
```python
import ddddocr
# 初始化滑块检测对象
slide = ddddocr.DdddOcr(det=False, ocr=False)
# 读取滑块图和背景图
with open('target.png', 'rb') as f:
target_bytes = f.read()
with open('background.png', 'rb') as f:
background_bytes = f.read()
# 匹配位置
res = slide.slide_match(target_bytes, background_bytes)
print(f"滑块位置: {res}")
# 可视化结果
background = cv2.imdecode(np.frombuffer(background_bytes, np.uint8), cv2.IMREAD_COLOR)
x1, y1, x2, y2 = res["target"]
# 在背景图上绘制匹配位置
cv2.rectangle(background, (x1, y1), (x2, y2), (0, 255, 0), 2)
# 显示结果
plt.figure(figsize=(10, 6))
plt.imshow(cv2.cvtColor(background, cv2.COLOR_BGR2RGB))
plt.title("滑块匹配结果")
plt.axis('off')
plt.savefig("slide_result.jpg")
plt.show()
```
**滑块匹配示例**:

滑块图
|
背景图
|
对于没有透明背景的滑块图,可以使用`simple_target`参数:
```python
res = slide.slide_match(target_bytes, background_bytes, simple_target=True)
```
#### 算法2:图像差异比较
适用于比较两张图片的不同之处,找出滑块缺口位置:
```python
import ddddocr
slide = ddddocr.DdddOcr(det=False, ocr=False)
# 读取带有缺口阴影的图片和完整图片
with open('bg.jpg', 'rb') as f:
target_bytes = f.read()
with open('fullpage.jpg', 'rb') as f:
background_bytes = f.read()
# 比较差异
res = slide.slide_comparison(target_bytes, background_bytes)
print(res) # 输出格式:{"target": [x, y]}
```
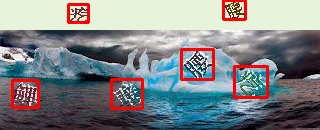
**图像差异比较示例**:

带缺口阴影的图片
|

完整图片
|
### 自定义模型导入
DdddOcr支持导入通过[dddd_trainer](https://github.com/sml2h3/dddd_trainer)训练的自定义模型:
```python
import ddddocr
# 导入自定义模型
ocr = ddddocr.DdddOcr(
det=False,
ocr=False,
import_onnx_path="mymodel.onnx",
charsets_path="charsets.json"
)
with open('test.jpg', 'rb') as f:
image_bytes = f.read()
res = ocr.classification(image_bytes)
print(res)
```
## 高级用法
### 批量处理
对大量验证码进行批量处理时,保持OCR实例的复用可以显著提高效率:
```python
import ddddocr
import os
import time
# 初始化OCR对象(只需一次)
ocr = ddddocr.DdddOcr()
# 批量处理目录中的所有图片
def batch_process(directory):
results = {}
start_time = time.time()
for filename in os.listdir(directory):
if filename.endswith(('.png', '.jpg', '.jpeg', '.bmp')):
file_path = os.path.join(directory, filename)
with open(file_path, 'rb') as f:
image = f.read()
# 使用同一个OCR实例处理所有图片
result = ocr.classification(image)
results[filename] = result
end_time = time.time()
print(f"处理 {len(results)} 张图片耗时: {end_time - start_time:.2f} 秒")
return results
# 使用示例
results = batch_process("./captchas/")
for filename, text in results.items():
print(f"{filename}: {text}")
```
### 多线程优化
在多线程环境下使用时,应当为每个线程创建独立的OCR实例:
```python
import ddddocr
import concurrent.futures
import os
def process_image(file_path):
# 每个线程创建自己的OCR实例
ocr = ddddocr.DdddOcr()
with open(file_path, 'rb') as f:
image = f.read()
result = ocr.classification(image)
return os.path.basename(file_path), result
def parallel_process(directory, max_workers=4):
file_paths = [os.path.join(directory, f) for f in os.listdir(directory)
if f.endswith(('.png', '.jpg', '.jpeg', '.bmp'))]
results = {}
with concurrent.futures.ThreadPoolExecutor(max_workers=max_workers) as executor:
future_to_file = {executor.submit(process_image, file_path): file_path for file_path in file_paths}
for future in concurrent.futures.as_completed(future_to_file):
filename, result = future.result()
results[filename] = result
return results
# 使用示例
results = parallel_process("./captchas/", max_workers=8)
```
### 验证码预处理
对于干扰较多的验证码,可以先进行预处理再识别:
```python
import ddddocr
import cv2
import numpy as np
from PIL import Image
import io
def preprocess_captcha(image_bytes):
# 转换为OpenCV格式
nparr = np.frombuffer(image_bytes, np.uint8)
img = cv2.imdecode(nparr, cv2.IMREAD_COLOR)
# 灰度化
gray = cv2.cvtColor(img, cv2.COLOR_BGR2GRAY)
# 二值化
_, binary = cv2.threshold(gray, 150, 255, cv2.THRESH_BINARY_INV)
# 去除小噪点
kernel = np.ones((2, 2), np.uint8)
opening = cv2.morphologyEx(binary, cv2.MORPH_OPEN, kernel)
# 转回字节流
is_success, buffer = cv2.imencode(".jpg", opening)
processed_bytes = io.BytesIO(buffer).getvalue()
return processed_bytes
# 使用示例
ocr = ddddocr.DdddOcr()
with open("noisy_captcha.jpg", "rb") as f:
image_bytes = f.read()
# 预处理验证码
processed_bytes = preprocess_captcha(image_bytes)
# 识别处理后的图片
result = ocr.classification(processed_bytes)
print(f"验证码识别结果: {result}")
```
## 常见问题
1. **初始化速度慢**
首次初始化DdddOcr对象时会加载模型,可能会比较慢,但只需要初始化一次即可。避免在循环中反复初始化。
```python
# 错误的用法
for img in images:
ocr = ddddocr.DdddOcr() # 每次都初始化,严重影响性能
result = ocr.classification(img)
# 正确的用法
ocr = ddddocr.DdddOcr() # 只初始化一次
for img in images:
result = ocr.classification(img)
```
2. **识别准确率不高**
- 尝试使用另一个OCR模型(设置`beta=True`)
- 对于特殊验证码,尝试使用颜色过滤功能
- 限定识别字符范围(使用`set_ranges`方法)
- 对于透明PNG图片,使用`png_fix=True`参数
3. **GPU加速**
可以通过设置`use_gpu=True`和`device_id`参数来启用GPU加速:
```python
ocr = ddddocr.DdddOcr(use_gpu=True, device_id=0)
```
使用GPU需确保已安装对应的CUDA版本和onnxruntime-gpu库。
4. **如何处理复杂验证码**
对于复杂的验证码,可以尝试以下步骤:
- 先使用目标检测功能定位验证码位置
- 对检测到的区域进行裁剪
- 应用颜色过滤去除干扰
- 使用OCR识别处理后的图片
5. **内存占用过高**
如果在同一程序中需要使用多个功能,建议不要同时初始化多个不同功能的实例,而是根据需要初始化:
```python
# 根据需要初始化不同的对象
if need_ocr:
processor = ddddocr.DdddOcr(ocr=True, det=False)
elif need_detection:
processor = ddddocr.DdddOcr(ocr=False, det=True)
```
6. **参数冲突问题**
当同时设置多个模式参数时,需注意优先级:
- `ocr=True`和`det=True`同时设置时,优先使用目标检测模式
- `beta=True`和`old=True`同时设置时,使用Beta模型(`old`当前不生效)
- 设置`import_onnx_path`时,`ocr`和`det`参数会被忽略
7. **支持的图片格式**
ddddocr支持多种图片格式:
- JPG/JPEG
- PNG (带透明通道时可配合`png_fix=True`)
- BMP
- GIF (仅识别第一帧)
对于不常见格式或Base64编码的图片,可以先转换为bytes:
```python
# Base64编码图片处理
import base64
image_bytes = base64.b64decode(base64_str)
result = ocr.classification(image_bytes)
```
8. **多线程并发问题**
在多线程环境下使用时,每个线程应当创建独立的OCR实例,否则可能导致识别结果错乱。
## 项目技术支持
本项目基于[dddd_trainer](https://github.com/sml2h3/dddd_trainer)训练所得,训练底层框架为PyTorch,推理底层依赖于[onnxruntime](https://pypi.org/project/onnxruntime/)。
## 使用示例
### 完整的验证码识别流程
```python
import ddddocr
import cv2
import numpy as np
from PIL import Image
import io
# 初始化OCR对象
ocr = ddddocr.DdddOcr()
# 读取验证码图片
with open("captcha.jpg", "rb") as f:
image_bytes = f.read()
# 转换为OpenCV格式进行预处理
# img = cv2.imdecode(np.frombuffer(image_bytes, np.uint8), cv2.IMREAD_COLOR)
# 预处理:灰度化、二值化等
# gray = cv2.cvtColor(img, cv2.COLOR_BGR2GRAY)
# _, binary = cv2.threshold(gray, 150, 255, cv2.THRESH_BINARY_INV)
# 转回字节流
# is_success, buffer = cv2.imencode(".jpg", binary)
# processed_bytes = io.BytesIO(buffer).getvalue()
# 识别处理后的图片
result = ocr.classification(image_bytes)
print(f"验证码识别结果: {result}")
```
### 滑块验证码完整示例
```python
import ddddocr
import cv2
import numpy as np
import matplotlib.pyplot as plt
# 初始化滑块检测对象
slide = ddddocr.DdddOcr(det=False, ocr=False)
# 读取滑块图和背景图
with open('target.png', 'rb') as f:
target_bytes = f.read()
with open('background.png', 'rb') as f:
background_bytes = f.read()
# 匹配位置
res = slide.slide_match(target_bytes, background_bytes)
print(f"滑块位置: {res}")
# 可视化结果
background = cv2.imdecode(np.frombuffer(background_bytes, np.uint8), cv2.IMREAD_COLOR)
x1, y1, x2, y2 = res["target"]
# 在背景图上绘制匹配位置
cv2.rectangle(background, (x1, y1), (x2, y2), (0, 255, 0), 2)
# 显示结果
plt.figure(figsize=(10, 6))
plt.imshow(cv2.cvtColor(background, cv2.COLOR_BGR2RGB))
plt.title("滑块匹配结果")
plt.axis('off')
plt.savefig("slide_result.jpg")
plt.show()
```
## API 服务
DdddOcr 提供了一键启动 API 服务的功能,可以通过 RESTful API 的方式访问 DdddOcr 的所有功能。
### 命令行启动 API 服务
```bash
# 使用默认配置启动 API 服务
python -m ddddocr api
# 指定 API 服务配置
python -m ddddocr api --host 0.0.0.0 --port 8000 --workers 4
# 配置 OCR 功能
python -m ddddocr api --ocr true --beta true
# 配置目标检测功能
python -m ddddocr api --ocr false --det true
```
> **提示**:如果直接运行 `python -m ddddocr.api`,默认会绑定在 `127.0.0.1`,可通过环境变量 `DDDDOCR_HOST` 覆盖。
### API 命令行参数说明
| 参数名 | 类型 | 默认值 | 说明 |
|-------|------|-------|------|
| `--host` | 字符串 | 0.0.0.0 | API 服务主机地址(`python -m ddddocr api` 默认) |
| `--port` | 整数 | 8000 | API 服务端口 |
| `--workers` | 整数 | 1 | API 服务工作进程数 |
| `--ocr` | 布尔值 | true | 是否启用 OCR 功能 |
| `--det` | 布尔值 | false | 是否启用目标检测功能 |
| `--old` | 布尔值 | false | 是否使用旧版 OCR 模型 |
| `--beta` | 布尔值 | false | 是否使用 Beta 版 OCR 模型 |
| `--use-gpu` | 布尔值 | false | 是否使用 GPU 加速 |
| `--device-id` | 整数 | 0 | GPU 设备 ID |
| `--show-ad` | 布尔值 | true | 是否显示广告 |
| `--import-onnx-path` | 字符串 | "" | 自定义模型路径 |
| `--charsets-path` | 字符串 | "" | 自定义字符集路径 |
### 使用 Docker 运行 API 服务
#### 构建并运行 Docker 镜像
```bash
# 构建 Docker 镜像
docker build -t ddddocr-api .
# 运行 Docker 容器
docker run -d --name ddddocr-api -p 8000:8000 ddddocr-api
# 使用自定义配置运行
docker run -d --name ddddocr-api \
-p 8000:8000 \
-e DDDDOCR_OCR=true \
-e DDDDOCR_BETA=true \
-e DDDDOCR_WORKERS=4 \
ddddocr-api
```
#### 使用 Docker Compose 运行 API 服务
```bash
# 使用默认配置启动
docker-compose up -d
# 使用自定义配置启动
DDDDOCR_OCR=true DDDDOCR_BETA=true DDDDOCR_WORKERS=4 docker-compose up -d
```
### API 接口说明
API 服务提供了以下接口:
#### 1. 文字识别接口 (OCR)
```
POST /ocr
```
请求体:
```json
{
"image": "图片的Base64编码字符串",
"probability": false,
"colors": [],
"custom_color_ranges": null
}
```
响应:
```json
{
"result": "识别到的文字",
"processing_time": 0.123
}
```
> **注意**:当 `probability=true` 时,API 会返回 `result` 为一个字典,包含 `charsets` 与 `probability` 字段,结构与本地 `classification(probability=True)` 一致。
#### 2. 目标检测接口
```
POST /det
```
请求体:
```json
{
"image": "图片的Base64编码字符串"
}
```
响应:
```json
{
"result": [
[x1, y1, x2, y2],
...
],
"processing_time": 0.123
}
```
#### 3. 滑块匹配接口
```
POST /slide_match
```
请求体:
```json
{
"target_image": "目标图片的Base64编码字符串",
"background_image": "背景图片的Base64编码字符串",
"simple_target": false,
"flag": false
}
```
响应:
```json
{
"result": {
"target_x": 0,
"target_y": 0,
"target": [x1, y1, x2, y2]
},
"processing_time": 0.123
}
```
#### 4. 滑块比较接口
```
POST /slide_comparison
```
请求体:
```json
{
"target_image": "目标图片的Base64编码字符串",
"background_image": "背景图片的Base64编码字符串"
}
```
响应:
```json
{
"result": {
"target": [x, y]
},
"processing_time": 0.123
}
```
#### 5. 设置字符范围接口
```
POST /set_charset_range
```
请求体:
```json
{
"charset_range": ["0", "1", "2", "3", "4", "5", "6", "7", "8", "9"]
}
```
响应:
```json
{
"result": "字符范围设置成功",
"charset_range": ["0", "1", "2", "3", "4", "5", "6", "7", "8", "9"],
"processing_time": 0.123
}
```
#### 6. 健康检查接口
```
GET /health
```
响应:
```json
{
"status": "ok",
"timestamp": 1628765432.1234
}
```
#### 文件上传接口
所有上述接口都支持通过表单上传文件的方式提交请求。例如:
```
POST /ocr/file
```
可以通过表单字段上传图片文件。
### API 客户端示例
#### Python 示例 (Base64编码方式)
```python
import requests
import base64
# 读取图片文件并Base64编码
with open("captcha.png", "rb") as f:
img_base64 = base64.b64encode(f.read()).decode()
# 发送OCR请求
url = "http://localhost:8000/ocr"
response = requests.post(url, json={"image": img_base64})
# 处理响应
result = response.json()
print(f"识别结果: {result['result']}")
```
#### Python 示例 (文件上传方式)
```python
import requests
# 准备文件
files = {"file": open("captcha.png", "rb")}
# 发送OCR请求
url = "http://localhost:8000/ocr/file"
response = requests.post(url, files=files)
# 处理响应
result = response.json()
print(f"识别结果: {result['result']}")
```
### Docker 环境变量配置参考
| 环境变量名 | 默认值 | 说明 |
|-----------|-------|------|
| `DDDDOCR_HOST` | 0.0.0.0(CLI 默认)/ 127.0.0.1(直接运行 api.py 默认) | API 服务主机地址 |
| `DDDDOCR_PORT` | 8000 | API 服务端口 |
| `DDDDOCR_WORKERS` | 1 | API 服务工作进程数 |
| `DDDDOCR_OCR` | true | 是否启用 OCR 功能 |
| `DDDDOCR_DET` | false | 是否启用目标检测功能 |
| `DDDDOCR_OLD` | false | 是否使用旧版 OCR 模型 |
| `DDDDOCR_BETA` | false | 是否使用 Beta 版 OCR 模型 |
| `DDDDOCR_USE_GPU` | false | 是否使用 GPU 加速 |
| `DDDDOCR_DEVICE_ID` | 0 | GPU 设备 ID |
| `DDDDOCR_SHOW_AD` | true | 是否显示广告 |
| `DDDDOCR_IMPORT_ONNX_PATH` | "" | 自定义模型路径 |
| `DDDDOCR_CHARSETS_PATH` | "" | 自定义字符集路径 |
## 许可证
本项目采用MIT许可证,详情请参阅[LICENSE](https://github.com/sml2h3/ddddocr/blob/master/LICENSE)文件。
## 输入与输出校验说明
- **图片合法性**:所有 Base64 与文件上传都会做尺寸、格式与大小校验(默认上限 8192 KB、最长边 4096px,可在实例化 `DdddOcr(max_image_bytes=..., max_image_side=...)` 时自定义),异常时返回 400。
- **允许格式**:PNG / JPEG / JPG / WEBP / BMP / GIF / TIFF。
- **输入类型**:本地调用支持 `bytes/bytearray`、Base64 字符串、文件路径或 `PIL.Image`。
- **类型约束**:`DdddOcr` 的公开方法会校验布尔/整数参数,`FastAPI` 层也通过 Pydantic 验证请求体,错误会带具体字段。
- **统一异常**:核心库新增 `DdddOcrInputError` / `InvalidImageError`,API 会把这些异常映射为 400,方便调用方处理。
- **响应结构**:HTTP 接口现有明确的 `response_model`,文档 (`/docs`) 中可直接查看字段含义。
- **模式提示**:在 `det=True` 模式下调用 `classification` 会抛出 “当前识别类型为目标检测”。
## 示例库
仓库新增 `examples/` 目录,覆盖本地调用、目标检测和 HTTP 客户端等典型场景:
- `basic_ocr.py`:最小 OCR 示例,可演示概率输出与颜色过滤。
- `detector.py`:演示如何用 `det=True` 模式返回所有检测框。
- `api_client.py`:演示如何向 `python -m ddddocr api` 服务发送 JSON 请求。
- `generate_basic_ocr_cases.py`:生成基础 OCR 测试用例图片。
详细说明见 `examples/README.md`,可结合 README 其他章节快速起步。