 # day08 Wiki
## 今日概要
- 表结构设计
- 快速开发
- 应用markdown组件
- 腾讯COS做上传
## 今日详细
### 1.表结构设计
| ID | 标题 | 内容 | 项目ID | 父ID | depth |
| ---- | ------ | -------------- | ------ | ---- | ----- |
| 1 | test | 山豆根发射点发 | 1 | null | 1 |
| 2 | 张家界 | 事故发生规划 | 1 | null | 1 |
| 3 | fh | 儿童火热拖后腿 | 1 | 1 | 2 |
父ID字段使用自关联,划分归属层级
### 2.快速开发
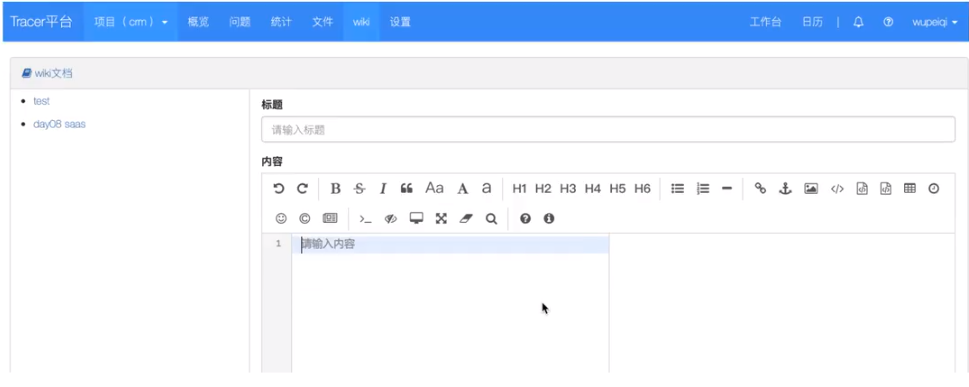
#### 2.1 wiki首页展示
- 首页:已完成
- 多级目录思路:
```
1级:
找到当前项目的所有文章的name
页面循环展示
多级:
去数据库获取每一级的数据
```
```
模板渲染:
- 数据库获取数据要有层级的划分
讲数据构造
[
{
id:1,
title:'lol',
children: {
id:xxx,
name:'xxxx'
}
}
]
缺点:
- 写代码费劲
- 效率低
```
```python
后端 + 前端完成Ajax+ID选择器
- 前端:打开页面之后。发送ajax请求获取所有的文档标题信息。
- 后台:获取所有的文章信息
queryset = model.wiki.objects.filter(project_id=2).values_list('id','title', 'parent_id')
[
{'id':1,'title':'为人体','parent_id': None},
{'id':2,'title':'温热','parent_id': None},
{'id':3,'title':'是的','parent_id': None},
{'id':4,'title':'不是','parent_id': 3},
]
直接返回给前端的ajax
- ajax的回调函数succsee中获取到res.data , 并循环
$.wach(res.data,funcion(index,item){
if(item.parent_id){
}else{
}
})
# day08 Wiki
## 今日概要
- 表结构设计
- 快速开发
- 应用markdown组件
- 腾讯COS做上传
## 今日详细
### 1.表结构设计

| ID | 标题 | 内容 | 项目ID | 父ID | depth |
| ---- | ------ | -------------- | ------ | ---- | ----- |
| 1 | test | 山豆根发射点发 | 1 | null | 1 |
| 2 | 张家界 | 事故发生规划 | 1 | null | 1 |
| 3 | fh | 儿童火热拖后腿 | 1 | 1 | 2 |
父ID字段使用自关联,划分归属层级
### 2.快速开发
#### 2.1 wiki首页展示
- 首页:已完成
- 多级目录思路:
```
1级:
找到当前项目的所有文章的name
页面循环展示
多级:
去数据库获取每一级的数据
```
```
模板渲染:
- 数据库获取数据要有层级的划分
讲数据构造
[
{
id:1,
title:'lol',
children: {
id:xxx,
name:'xxxx'
}
}
]
缺点:
- 写代码费劲
- 效率低
```
```python
后端 + 前端完成Ajax+ID选择器
- 前端:打开页面之后。发送ajax请求获取所有的文档标题信息。
- 后台:获取所有的文章信息
queryset = model.wiki.objects.filter(project_id=2).values_list('id','title', 'parent_id')
[
{'id':1,'title':'为人体','parent_id': None},
{'id':2,'title':'温热','parent_id': None},
{'id':3,'title':'是的','parent_id': None},
{'id':4,'title':'不是','parent_id': 3},
]
直接返回给前端的ajax
- ajax的回调函数succsee中获取到res.data , 并循环
$.wach(res.data,funcion(index,item){
if(item.parent_id){
}else{
}
})
- 万元
- 张浩
{{ field }}
2. 应用js和css
3. 初始化
4. 全屏样式
.editormd-fullscreen{
z-index: 1001;
}
```
[](https://www.mdeditor.com/)
[](https://www.github.com/pandao/editor.md)
[](https://pandao.github.io/editor.md/)
- 预览页面按照markdown格式显示
```html
1. 内容区域
 #### 4.3 python实现上传文件
1. 安装
```
pip install -U cos-python-sdk-v5
```
2. 初始化
```python
# -*- coding=utf-8
# appid 已在配置中移除,请在参数 Bucket 中带上 appid。Bucket 由 BucketName-APPID 组成
# 1. 设置用户配置, 包括 secretId,secretKey 以及 Region
from qcloud_cos import CosConfig
from qcloud_cos import CosS3Client
import sys
import logging
logging.basicConfig(level=logging.INFO, stream=sys.stdout)
secret_id = 'COS_SECRETID' # 替换为用户的 secretId
secret_key = 'COS_SECRETKEY' # 替换为用户的 secretKey
region = 'ap-chengdu' # 替换为用户的 Region
token = None # 使用临时密钥需要传入 Token,默认为空,可不填
scheme = 'https' # 指定使用 http/https 协议来访问 COS,默认为 https,可不填
config = CosConfig(Region=region, SecretId=secret_id, SecretKey=secret_key, Token=token, Scheme=scheme)
# 2. 获取客户端对象
client = CosS3Client(config)
# 参照下文的描述。或者参照 Demo 程序,详见 https://github.com/tencentyun/cos-python-sdk-v5/blob/master/qcloud_cos/demo.py
```
```python
# 创建存储桶
response = client.create_bucket(
Bucket='examplebucket-1250000000'
)
```
```python
#### 高级上传接口(推荐)
# 根据文件大小自动选择简单上传或分块上传,分块上传具备断点续传功能。
response = client.upload_file(
Bucket='picture-1302428193',
LocalFilePath='local.txt',
Key='picture.jpg',
PartSize=1,
MAXThread=10,
EnableMD5=False
)
print(response['ETag'])
```
示例代码
```python
from scripts import offline_scripts_base
from qcloud_cos import CosConfig
from qcloud_cos import CosS3Client
from django.conf import settings
import sys
secret_id = settings.TENCENT_SECRET_ID # 替换为用户的 secretId
secret_key = settings.TENCENT_SECRET_KEY # 替换为用户的 secretKey
region = 'ap-chengdu' # 替换为用户的 Region
config = CosConfig(Region=region, SecretId=secret_id, SecretKey=secret_key)
# 2. 获取客户端对象
client = CosS3Client(config)
# 参照下文的描述。或者参照 Demo 程序,详见 https://github.com/tencentyun/cos-python-sdk-v5/blob/master/qcloud_cos/demo.py
response = client.upload_file(
Bucket='picture-1302428193',
LocalFilePath='picture.jpg', # 本地文件路径
Key='elephant.jpg', # 上传到桶之后的名字
)
print(response['ETag'])
```
### 5.项目中集成COS
希望我们的项目在用到的图片可以放在COS中,防止我们的服务处理图片时压力过大。
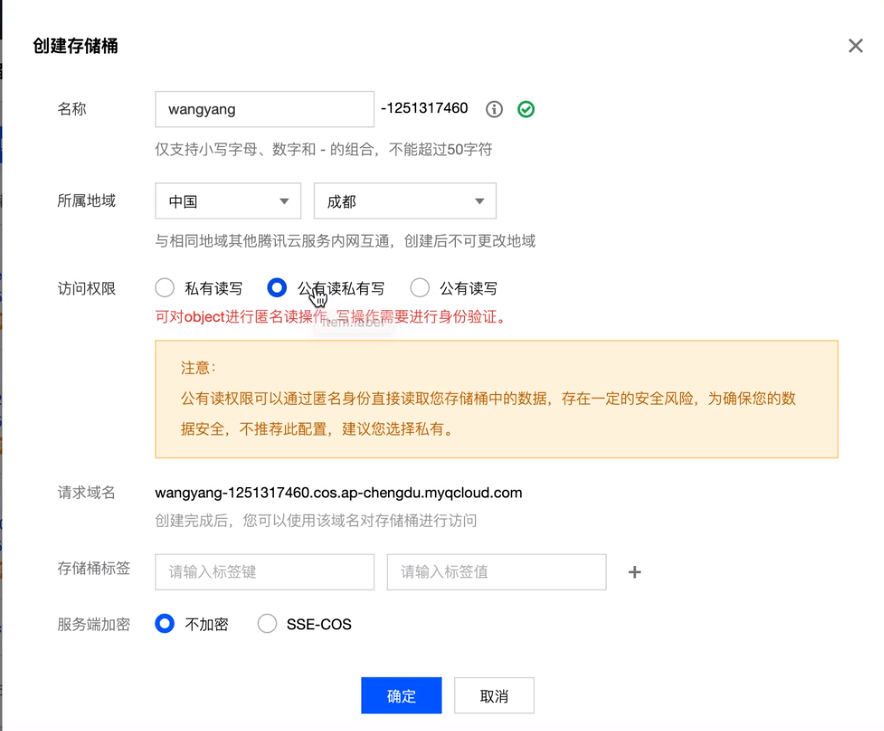
#### 5.1 创建项目时同时创建一个桶
```python
if form.is_valid():
# 1. 为项目创建一个桶
name = form.cleaned_data.get('name')
bucket = "{}-{}-{}-1302428193".format(name, request.tracer.user.phone, str(int(time.time())))
region = "ap-chengdu"
create_bucket(bucket=bucket, region=region)
# 把桶和区域写入数据库
# 验证通过: 项目名、颜色、描述 + creator谁创建的项目
form.instance.bucket = bucket
form.instance.region = region
form.instance.creator = request.tracer.user
# 创建项目
form.save()
return JsonResponse({'status': True})
```
```python
from qcloud_cos import CosConfig
from qcloud_cos import CosS3Client
from django.conf import settings
import sys
def create_bucket(bucket, region='ap-chengdu'):
"""
创建桶
:param bucket:桶名称
:param region: 区域
:return:
"""
config = CosConfig(Region=region, SecretId=settings.TENCENT_SECRET_ID, SecretKey=settings.TENCENT_SECRET_KEY)
# 2. 获取客户端对象
client = CosS3Client(config)
# 参照下文的描述。或者参照 Demo 程序,详见 https://github.com/tencentyun/cos-python-sdk-v5/blob/master/qcloud_cos/demo.py
client.create_bucket(
Bucket=bucket,
ACL="public-read" # private / public-read /public-read-write
)
```
#### 5.2 markdown上传图片到cos
- cos上传文件: 本地文件; 接收markdown上传的文件在进行上传。
- markdown上传图片。
# day10 文件管理思路
## 功能介绍:
- 文件夹
- 文件
## 知识点:
- 模态对话框 & Ajax & 后台ModelForm校验
- 目录切换:展示当前文件夹 & 文件
- 删除文件夹:嵌套子文件 & 文件夹删除
- js上传文件到cos(Wiki使用的是python)
- 进度条操作
- 删除文件:
- 数据库中删除
- cos中也需要删除
- 下载文件
## 今日概要
- 设计
- 表结构的创建
- 单独知识点
## 今日详细
### 1.功能设计

### 2.数据库设计
| ID | 项目ID | 名称 | 类型 | 大小 | 父目录 | 更新者 | 更新时间 | key |
| ---- | ------ | ------------ | ---- | ---- | ------ | ------ | -------- | ---- |
| 1 | 9 | 阿尔法色 | 2 | 100 | null | | | |
| 2 | 9 | 撒旦飞洒 | 2 | null | 1 | | | |
| 3 | 9 | 儿童和肉体和 | 2 | null | 1 | | | |
| 4 | 9 | 12.png | 1 | 1000 | | | | |
| 5 | 9 | 13.png | 1 | 1100 | | | | |
| 6 | 9 | 14.png | 1 | 1000 | | | | |
| 7 | | | | | | | | |
```python
class FileRepository(models.Model):
"""文件库"""
project = models.ForeignKey(verbose_name='项目', to='Project')
file_type_choices = (
(1, '文件'),
(2, '文件夹'),
)
file_type = models.SmallIntegerField(verbose_name='类型', choices=file_type_choices)
name = models.CharField(verbose_name='文件夹名称', max_length=32, help_text='文件/文件夹名')
key = models.CharField(verbose_name='文件存储在cos中的key', max_length=128, null=True, blank=True)
file_size = models.IntegerField(verbose_name='文件大小', null=True, blank=True)
file_path = models.CharField(verbose_name='文件路径', max_length=255, null=True, blank=True)
parent = models.ForeignKey(verbose_name='父级目录', to='self', related_name='child', null=True, blank=True)
update_user = models.ForeignKey(verbose_name='最近更新者', to='UserInfo')
update_datetime = models.DateTimeField(verbose_name='更新时间', auto_now=True)
```
### 3.知识点
#### 3.1 URL传参 or 不传参
```
url(r'^file/$', manage.file, name='file'),
```
```python
# /file/
# /file/?folder_id=50
def file(request, project_id)
folder_id = request.GET.get('folder_id')
```
#### 3.2 模态框 + 警告框

https://v3.bootcss.com/javascript/#alerts
#### 3.3 获取导航条

```python
# /file/
# /file/?folder_id=50
def file(request, project_id)
folder_id = request.GET.get('folder_id')
url_list = []
if not folder_id:
pass
else:
file_object = models.FileRespository.objects.filter(id=folder_id, file_type=2).first()
row_object = file_object
while row_object:
url_list.insert(0, row_object_name)
row_object = row_object.parent
```
#### 3.4 cos上传文件:python
```python
def upload_file(bucket, region, file_object, key):
"""
上传图片到cos桶
:param bucket:桶名称
:param region: 区域
:param file_object:图片对象
:param key: 图片名字
:return:
"""
config = CosConfig(Region=region, SecretId=settings.TENCENT_SECRET_ID, SecretKey=settings.TENCENT_SECRET_KEY)
client = CosS3Client(config)
response = client.upload_file_from_buffer(
Bucket=bucket,
Key=key, # 上传到桶之后的名字
Body=file_object # 文件对象
)
# https://picture-1302428193.cos.ap-chengdu.myqcloud.com/elephant.jpg
return "https://{}.cos.{}.myqcloud.com/{}".format(bucket, region, key)
```
详细:python操作cos的API(SDK)
注意:密钥安全
#### 3.5 cos上传文件 :js [建议官方文档]

##### 1. 下载js(前端SDK)
地址:https://github.com/tencentyun/cos-js-sdk-v5/tree/master/dist
```html
script>
```
##### 2. 查看官方文档
地址https://cloud.tencent.com/document/product/436/11459
```html
```
格式一(推荐):后端通过获取临时密钥给到前端,前端计算签名。
```html
```
##### 3. 跨域问题


解决:

#### 3.6 cos上传文件:临时密钥[推荐]

##### 1.路由
```
url(r'^demo2/$', manage.file, name='demo2'),
url(r'^cos/credential/$', manage.cos_credential, name='cos_credential'),
```
##### 2.视图
```python
def demo2(request):
retrun render(request, 'demo2,html')
def cos_credential(request):
# 生成一个临时凭证,并给前端返回
# 1. 安装一个SDK pip isntall -U qcloud-python-sts
# 2. 写代码
from sts.sts import Sts
config = {
# 临时密钥有效期,单位秒,(30分钟=1800秒)
'duration_seconds': 1800,
# 固定密钥 id
'secret_id':'afdaf',
# 固定密钥 key
'secret_key': 'wagweg',
# 桶名称
'bucket': '',
# 桶所在地区
'region': 'ap-chengdu',
#允许的文件前缀
'allow_prefix':'*'
# 密钥权限列表
'allow_actions': [
'name/cos:PostObject',
# '*' # 代表所有权限都可以
],
}
sts = Sts(config)
result_dict = sts.get_credential()
retrun JsonResponse(result_dict)
```
##### 3.html页面
```html
{% load stact %}
...
{% block js %}
{% endblock %}
```
##### 4.跨域解决
##### 总结:
- python直接上传
- js + 临时凭证(跨域问题)
#### 3.7 cos的功能 & 项目
##### 1.创建项目 & 创建存储桶
```python
def project_list(request):
"""项目列表"""
# POST,对话框的ajax添加项目。
form = ProjectModelForm(request, data=request.POST)
if form.is_valid():
# 1. 为项目创建一个桶 & 创建跨域规则
name = form.cleaned_data.get('name')
bucket = "{}-{}-1302428193".format(request.tracer.user.phone, str(int(time.time())))
region = "ap-chengdu"
create_bucket(bucket=bucket, region=region)
# 把桶和区域写入数据库
# 验证通过: 项目名、颜色、描述 + creator谁创建的项目
form.instance.bucket = bucket
form.instance.region = region
form.instance.creator = request.tracer.user
# 创建项目
form.save()
return JsonResponse({'status': True})
# 验证不通过 返回错误信息
return JsonResponse({'status': False, 'error': form.errors})
```
```python
def create_bucket(bucket, region='ap-chengdu'):
"""
创建桶
:param bucket:桶名称
:param region: 区域
:return:
"""
config = CosConfig(Region=region, SecretId=settings.TENCENT_SECRET_ID, SecretKey=settings.TENCENT_SECRET_KEY)
# 2. 获取客户端对象
client = CosS3Client(config)
# 参照下文的描述。或者参照 Demo 程序,详见 https://github.com/tencentyun/cos-python-sdk-v5/blob/master/qcloud_cos/demo.py
client.create_bucket(
Bucket=bucket,
ACL="public-read" # private / public-read /public-read-write
)
# 配置跨域设置
cors_config = {
'CORSRule': [
{
'AllowedOrigin': '*',
'AllowedMethod': ['GET', 'PUT', 'HEAD', 'POST', 'DELETE'],
'AllowedHeader': '*',
'ExposeHeader': '*',
'MaxAgeSeconds': 500,
}
]
}
client.put_bucket_cors(
Bucket=bucket,
CORAConfiguration=cors_config,
)
```
#### 3.8 markdown上传文件【无改动】
#### 3.9 js上传文件
- 临时凭证:当前项目的 桶&区域 (request.tracer.project)
- js上传文件: 设置当前的 桶&区域
#### 3.10 this
```js
var name='YanYeek'
function func(){
var name='CC'
console.log(name) // CC
}
func();
```
```js
var name='YanYeek'
function func(){
var name='CC'
console.log(this.name) // YanYeek
}
func(); // this=全局window 相当于window
```
```js
var name='YanYeek'
info = {
name='Yahoo'
func:function(){
console.log(this.name) // Yahoo
function test(){
console.log(this.name)
}
teat()
}
}
info.func()
```
总结:每个函数都是一个作用域,在它的内部都会存在this,谁调用的函数,谁就是this
不管嵌套多少次,函数被调用的前面是谁,它的this就是谁。
#### 3.11 闭包
```js
data_list = [11,22,33]
$.each(data_list, function(index,value){
console.log(value);
})
for(var i ;i++; i < data_list.length){
console.log(i, data_list[i]);
}
```
```js
data_list = [11,22,33]
for(var i=0 ;i++; i < data_list.length){
// 循环发送3次ajax请求,由于ajax是异步请求,所有在发送请求时不会等待.
$.ajax({
url:"...",
data:{value:data_list[i]},
success: function(res){
// 1分钟之后执行回调函数
}
})
}
console.log("YanYeek")
```
```js
data_list = [11,22,33]
for(var i=0 ;i++; i < data_list.length){
// 循环发送3次ajax请求,由于ajax是异步请求,所有在发送请求时不会等待.
$.ajax({
url:"...",
data:{value:data_list[i]},
success: function(res){
// 1分钟之后执行回调函数
console.log(i) // 全部输出:2
}
})
}
console.log(i) // 输出:2
```
```js
data_list = [11,22,33]
for(var i=0 ;i++; i < data_list.length){
// 循环发送3次ajax请求,由于ajax是异步请求,所有在发送请求时不会等待.
function xx(data){
$.ajax({
url:"...",
data:{value:data_list[i]},
success: function(res){
// 1分钟之后执行回调函数
console.log(data) // 全部输出:2
}
})
}
xx(i)
}
// 用函数嵌套ajax异步请求,让它同时开了3块不同的空间,i也被data接收变成了三个不同的值,所以实现了回调函数分别打出0,1,2,的效果。
console.log(i) // 输出:2
```
注意事项:如果循环,循环内容发送异步请求,一部任务成功之后,通过闭包来解决。
# day11 文件管理
## 今日概要
- 文件夹管理
- 文件上传
- 思考:限制如何实现?
## 今日详细
### 1.文件夹管理
#### 1.1 创建文件夹
#### 1.2 文件列表 & 进入文件夹
#### 1.3 编辑文件夹
#### 1.4 删除文件夹(DB级联删除 & 删除COS文件)
### 2.文件上传
#### 2.1 上传按钮
#### 2.2 获取临时凭证&上传文件
#### 2.3 右下角展示进度条
#### 2.4 上传文件保存到数据库
# day12 文件上传
## 今日概要
- 获取临时凭证 & 上传文件
- 右下角展示进度条
- 上传文件保存到数据库
- 容量的限制
## 今日详细
### 1.获取临时凭证&上传文件
- 创建项目L添加跨域
- 上传文件前:获取临时凭证
- 全局:默认超时之后JDK自动再次获取(官方推荐)。
ps:new了一个cos对象必须调用才会执行里面的方法发请求。
- 局部:每次上传文件之前,进行临时凭证获取。
- 容量限制:
- 单文件限制
- 总容量限制
注意:容量不合法,错误提示;合法,继续上传
- 继续上传
- 上传成功之后:将当前上传的信息发送至数据库
- 前端向cos上传文件成功之后
- 前端向后台发送请求:文件大小/文件名/文件 。。。(后台数据保存到数据库)

- 实时展示添加的文件
扩展:ajax向后台发送消息
```js
前端:
$.ajax({
data:{name:11. age:22,xx:[11,22,33]}
})
Django后台:
request.POST
request.POST.get('name')
request.POST.get('age')
request.POST.get('xx')
多层嵌套的复杂数据django获取不到
```
```js
前端:
$.ajax({
data: JSON.stringfy({name:11. age:22,xx:[11,22,33]})
})
Django后台:
request.body
info = json.loads(request.body.decode('utf-8'))
info['name']
把数据JSON化才行,接收要用body接收字节后要编码为字符串。
```
# day13


## 今日概要
- 文件管理:下载
- 项目删除
- 问题管理:
- 表结构设计
- 新建问题
- 问题展示列表
- 分页处理
## 今日详细
### 1.下载文件
```
浏览器 django
请求 HttpResponse(...)文本;响应头
请求 render(...) 文本;响应头
请求 ... 文件内容;响应头
```

```python
def download(request):
# 打开文件,获取文件的内容
with open('xxx.xxx', mode ='rb') as f:
data = f.read()
response = HttpResponse(data)
response["Content-Disposition"] = "attachment; filename=xxx.png"
return response
```
### 2.删除项目
- 项目删除
- 桶删除
- 删除所有文件
- 删除碎片文件
- wiki图片思考
- 如果要实现文章的图片删除功能就要加更多没必要的逻辑,服务器压力太大。
- 考虑服务器与开发时间成本不划算。
### 3.问题管理
#### 3.1 设计表结构


```
- 产品经理:功能 +原型图
- 开发人员:第一步表结构设计
```
| ID | 标题 | 内容 | 问题类型 | 模块 | 状态CH | 优先级CH | 指派FK | 关注者m2m | 开始时间 | 结束时间 | 模式 | 父问题 |
| ---- | ---- | ---- | -------- | ---- | ------ | -------- | ------ | --------- | -------- | -------- | ---- | ------ |
| | | | | | | | | | | | | |
| | | | | | | | | | | | | |
| | | | | | | | | | | | | |
| ID | 问题类型 | 项目ID | 颜色 |
| ---- | -------- | ------ | ---- |
| 1 | Bug | | |
| 2 | 功能 | | |
| 3 | 任务 | | |
| ID | 模块 | 项目ID |
| ---- | --------------- | ------ |
| 1 | 第一期 用户认证 | |
| 2 | 第二期 任务管理 | |
| 3 | 第三期 支付 | |
#### 3.2 新建问题
##### 3.2.1 模态对话框
- 显示对话框
- 显示用户要填写的数据(表单)
前端插件:
- bootstrap-datepicker
```
css
js
找到标签处理
```
- bootstrap-select插件
```python
css
js
ModelForm中添加属性
class IssuesModalForm(BootStrapForm, forms.ModelForm):
class Meta:
model = models.Issues
exclude = ['project', 'creator', 'create_datetime', 'latest_update_datetime']
widgets = {
'assign': forms.Select(attrs={'class': 'selectpicker', 'data-live-search': 'true'}),
'attention': forms.SelectMultiple(
attrs={'class': 'selectpicker', 'data-live-search': 'true', 'data-actions-box': 'true'}),
}
class BootStrapForm(object):
bootstrap_class_exclude = []
def __init__(self, *args, **kwargs):
super().__init__(*args, **kwargs)
for name, field in self.fields.items():
if name in self.bootstrap_class_exclude:
continue
old_class = field.widget.attrs.get('class', '')
field.widget.attrs['class'] = f'{old_class} form-control'
field.widget.attrs['placeholder'] = '请输入%s' % (field.label,)
```
#### 3.3 问题列表
#### 3.4 自定义分页(10年前文件)
# day14
## 今日概要
- 添加问题
- 问题列表 + 分页
- 编辑问题
- 回复
- 问题变更
## 今日详细
### 1.添加问题
#### 1.1 数据初始化和合法性
#### 1.2 添加数据(成功之后刷新页面)
#### 1.3 错误提示
`为了避免插入error-msg冲突,把form渲染的内容嵌套一个div,但是bootstrap-select默认会在嵌套一个div,应用了此插件可不用嵌套`
```html
#### 4.3 python实现上传文件
1. 安装
```
pip install -U cos-python-sdk-v5
```
2. 初始化
```python
# -*- coding=utf-8
# appid 已在配置中移除,请在参数 Bucket 中带上 appid。Bucket 由 BucketName-APPID 组成
# 1. 设置用户配置, 包括 secretId,secretKey 以及 Region
from qcloud_cos import CosConfig
from qcloud_cos import CosS3Client
import sys
import logging
logging.basicConfig(level=logging.INFO, stream=sys.stdout)
secret_id = 'COS_SECRETID' # 替换为用户的 secretId
secret_key = 'COS_SECRETKEY' # 替换为用户的 secretKey
region = 'ap-chengdu' # 替换为用户的 Region
token = None # 使用临时密钥需要传入 Token,默认为空,可不填
scheme = 'https' # 指定使用 http/https 协议来访问 COS,默认为 https,可不填
config = CosConfig(Region=region, SecretId=secret_id, SecretKey=secret_key, Token=token, Scheme=scheme)
# 2. 获取客户端对象
client = CosS3Client(config)
# 参照下文的描述。或者参照 Demo 程序,详见 https://github.com/tencentyun/cos-python-sdk-v5/blob/master/qcloud_cos/demo.py
```
```python
# 创建存储桶
response = client.create_bucket(
Bucket='examplebucket-1250000000'
)
```
```python
#### 高级上传接口(推荐)
# 根据文件大小自动选择简单上传或分块上传,分块上传具备断点续传功能。
response = client.upload_file(
Bucket='picture-1302428193',
LocalFilePath='local.txt',
Key='picture.jpg',
PartSize=1,
MAXThread=10,
EnableMD5=False
)
print(response['ETag'])
```
示例代码
```python
from scripts import offline_scripts_base
from qcloud_cos import CosConfig
from qcloud_cos import CosS3Client
from django.conf import settings
import sys
secret_id = settings.TENCENT_SECRET_ID # 替换为用户的 secretId
secret_key = settings.TENCENT_SECRET_KEY # 替换为用户的 secretKey
region = 'ap-chengdu' # 替换为用户的 Region
config = CosConfig(Region=region, SecretId=secret_id, SecretKey=secret_key)
# 2. 获取客户端对象
client = CosS3Client(config)
# 参照下文的描述。或者参照 Demo 程序,详见 https://github.com/tencentyun/cos-python-sdk-v5/blob/master/qcloud_cos/demo.py
response = client.upload_file(
Bucket='picture-1302428193',
LocalFilePath='picture.jpg', # 本地文件路径
Key='elephant.jpg', # 上传到桶之后的名字
)
print(response['ETag'])
```
### 5.项目中集成COS
希望我们的项目在用到的图片可以放在COS中,防止我们的服务处理图片时压力过大。
#### 5.1 创建项目时同时创建一个桶
```python
if form.is_valid():
# 1. 为项目创建一个桶
name = form.cleaned_data.get('name')
bucket = "{}-{}-{}-1302428193".format(name, request.tracer.user.phone, str(int(time.time())))
region = "ap-chengdu"
create_bucket(bucket=bucket, region=region)
# 把桶和区域写入数据库
# 验证通过: 项目名、颜色、描述 + creator谁创建的项目
form.instance.bucket = bucket
form.instance.region = region
form.instance.creator = request.tracer.user
# 创建项目
form.save()
return JsonResponse({'status': True})
```
```python
from qcloud_cos import CosConfig
from qcloud_cos import CosS3Client
from django.conf import settings
import sys
def create_bucket(bucket, region='ap-chengdu'):
"""
创建桶
:param bucket:桶名称
:param region: 区域
:return:
"""
config = CosConfig(Region=region, SecretId=settings.TENCENT_SECRET_ID, SecretKey=settings.TENCENT_SECRET_KEY)
# 2. 获取客户端对象
client = CosS3Client(config)
# 参照下文的描述。或者参照 Demo 程序,详见 https://github.com/tencentyun/cos-python-sdk-v5/blob/master/qcloud_cos/demo.py
client.create_bucket(
Bucket=bucket,
ACL="public-read" # private / public-read /public-read-write
)
```
#### 5.2 markdown上传图片到cos
- cos上传文件: 本地文件; 接收markdown上传的文件在进行上传。
- markdown上传图片。
# day10 文件管理思路
## 功能介绍:
- 文件夹
- 文件
## 知识点:
- 模态对话框 & Ajax & 后台ModelForm校验
- 目录切换:展示当前文件夹 & 文件
- 删除文件夹:嵌套子文件 & 文件夹删除
- js上传文件到cos(Wiki使用的是python)
- 进度条操作
- 删除文件:
- 数据库中删除
- cos中也需要删除
- 下载文件
## 今日概要
- 设计
- 表结构的创建
- 单独知识点
## 今日详细
### 1.功能设计

### 2.数据库设计
| ID | 项目ID | 名称 | 类型 | 大小 | 父目录 | 更新者 | 更新时间 | key |
| ---- | ------ | ------------ | ---- | ---- | ------ | ------ | -------- | ---- |
| 1 | 9 | 阿尔法色 | 2 | 100 | null | | | |
| 2 | 9 | 撒旦飞洒 | 2 | null | 1 | | | |
| 3 | 9 | 儿童和肉体和 | 2 | null | 1 | | | |
| 4 | 9 | 12.png | 1 | 1000 | | | | |
| 5 | 9 | 13.png | 1 | 1100 | | | | |
| 6 | 9 | 14.png | 1 | 1000 | | | | |
| 7 | | | | | | | | |
```python
class FileRepository(models.Model):
"""文件库"""
project = models.ForeignKey(verbose_name='项目', to='Project')
file_type_choices = (
(1, '文件'),
(2, '文件夹'),
)
file_type = models.SmallIntegerField(verbose_name='类型', choices=file_type_choices)
name = models.CharField(verbose_name='文件夹名称', max_length=32, help_text='文件/文件夹名')
key = models.CharField(verbose_name='文件存储在cos中的key', max_length=128, null=True, blank=True)
file_size = models.IntegerField(verbose_name='文件大小', null=True, blank=True)
file_path = models.CharField(verbose_name='文件路径', max_length=255, null=True, blank=True)
parent = models.ForeignKey(verbose_name='父级目录', to='self', related_name='child', null=True, blank=True)
update_user = models.ForeignKey(verbose_name='最近更新者', to='UserInfo')
update_datetime = models.DateTimeField(verbose_name='更新时间', auto_now=True)
```
### 3.知识点
#### 3.1 URL传参 or 不传参
```
url(r'^file/$', manage.file, name='file'),
```
```python
# /file/
# /file/?folder_id=50
def file(request, project_id)
folder_id = request.GET.get('folder_id')
```
#### 3.2 模态框 + 警告框

https://v3.bootcss.com/javascript/#alerts
#### 3.3 获取导航条

```python
# /file/
# /file/?folder_id=50
def file(request, project_id)
folder_id = request.GET.get('folder_id')
url_list = []
if not folder_id:
pass
else:
file_object = models.FileRespository.objects.filter(id=folder_id, file_type=2).first()
row_object = file_object
while row_object:
url_list.insert(0, row_object_name)
row_object = row_object.parent
```
#### 3.4 cos上传文件:python
```python
def upload_file(bucket, region, file_object, key):
"""
上传图片到cos桶
:param bucket:桶名称
:param region: 区域
:param file_object:图片对象
:param key: 图片名字
:return:
"""
config = CosConfig(Region=region, SecretId=settings.TENCENT_SECRET_ID, SecretKey=settings.TENCENT_SECRET_KEY)
client = CosS3Client(config)
response = client.upload_file_from_buffer(
Bucket=bucket,
Key=key, # 上传到桶之后的名字
Body=file_object # 文件对象
)
# https://picture-1302428193.cos.ap-chengdu.myqcloud.com/elephant.jpg
return "https://{}.cos.{}.myqcloud.com/{}".format(bucket, region, key)
```
详细:python操作cos的API(SDK)
注意:密钥安全
#### 3.5 cos上传文件 :js [建议官方文档]

##### 1. 下载js(前端SDK)
地址:https://github.com/tencentyun/cos-js-sdk-v5/tree/master/dist
```html
script>
```
##### 2. 查看官方文档
地址https://cloud.tencent.com/document/product/436/11459
```html
```
格式一(推荐):后端通过获取临时密钥给到前端,前端计算签名。
```html
```
##### 3. 跨域问题


解决:

#### 3.6 cos上传文件:临时密钥[推荐]

##### 1.路由
```
url(r'^demo2/$', manage.file, name='demo2'),
url(r'^cos/credential/$', manage.cos_credential, name='cos_credential'),
```
##### 2.视图
```python
def demo2(request):
retrun render(request, 'demo2,html')
def cos_credential(request):
# 生成一个临时凭证,并给前端返回
# 1. 安装一个SDK pip isntall -U qcloud-python-sts
# 2. 写代码
from sts.sts import Sts
config = {
# 临时密钥有效期,单位秒,(30分钟=1800秒)
'duration_seconds': 1800,
# 固定密钥 id
'secret_id':'afdaf',
# 固定密钥 key
'secret_key': 'wagweg',
# 桶名称
'bucket': '',
# 桶所在地区
'region': 'ap-chengdu',
#允许的文件前缀
'allow_prefix':'*'
# 密钥权限列表
'allow_actions': [
'name/cos:PostObject',
# '*' # 代表所有权限都可以
],
}
sts = Sts(config)
result_dict = sts.get_credential()
retrun JsonResponse(result_dict)
```
##### 3.html页面
```html
{% load stact %}
...
{% block js %}
{% endblock %}
```
##### 4.跨域解决
##### 总结:
- python直接上传
- js + 临时凭证(跨域问题)
#### 3.7 cos的功能 & 项目
##### 1.创建项目 & 创建存储桶
```python
def project_list(request):
"""项目列表"""
# POST,对话框的ajax添加项目。
form = ProjectModelForm(request, data=request.POST)
if form.is_valid():
# 1. 为项目创建一个桶 & 创建跨域规则
name = form.cleaned_data.get('name')
bucket = "{}-{}-1302428193".format(request.tracer.user.phone, str(int(time.time())))
region = "ap-chengdu"
create_bucket(bucket=bucket, region=region)
# 把桶和区域写入数据库
# 验证通过: 项目名、颜色、描述 + creator谁创建的项目
form.instance.bucket = bucket
form.instance.region = region
form.instance.creator = request.tracer.user
# 创建项目
form.save()
return JsonResponse({'status': True})
# 验证不通过 返回错误信息
return JsonResponse({'status': False, 'error': form.errors})
```
```python
def create_bucket(bucket, region='ap-chengdu'):
"""
创建桶
:param bucket:桶名称
:param region: 区域
:return:
"""
config = CosConfig(Region=region, SecretId=settings.TENCENT_SECRET_ID, SecretKey=settings.TENCENT_SECRET_KEY)
# 2. 获取客户端对象
client = CosS3Client(config)
# 参照下文的描述。或者参照 Demo 程序,详见 https://github.com/tencentyun/cos-python-sdk-v5/blob/master/qcloud_cos/demo.py
client.create_bucket(
Bucket=bucket,
ACL="public-read" # private / public-read /public-read-write
)
# 配置跨域设置
cors_config = {
'CORSRule': [
{
'AllowedOrigin': '*',
'AllowedMethod': ['GET', 'PUT', 'HEAD', 'POST', 'DELETE'],
'AllowedHeader': '*',
'ExposeHeader': '*',
'MaxAgeSeconds': 500,
}
]
}
client.put_bucket_cors(
Bucket=bucket,
CORAConfiguration=cors_config,
)
```
#### 3.8 markdown上传文件【无改动】
#### 3.9 js上传文件
- 临时凭证:当前项目的 桶&区域 (request.tracer.project)
- js上传文件: 设置当前的 桶&区域
#### 3.10 this
```js
var name='YanYeek'
function func(){
var name='CC'
console.log(name) // CC
}
func();
```
```js
var name='YanYeek'
function func(){
var name='CC'
console.log(this.name) // YanYeek
}
func(); // this=全局window 相当于window
```
```js
var name='YanYeek'
info = {
name='Yahoo'
func:function(){
console.log(this.name) // Yahoo
function test(){
console.log(this.name)
}
teat()
}
}
info.func()
```
总结:每个函数都是一个作用域,在它的内部都会存在this,谁调用的函数,谁就是this
不管嵌套多少次,函数被调用的前面是谁,它的this就是谁。
#### 3.11 闭包
```js
data_list = [11,22,33]
$.each(data_list, function(index,value){
console.log(value);
})
for(var i ;i++; i < data_list.length){
console.log(i, data_list[i]);
}
```
```js
data_list = [11,22,33]
for(var i=0 ;i++; i < data_list.length){
// 循环发送3次ajax请求,由于ajax是异步请求,所有在发送请求时不会等待.
$.ajax({
url:"...",
data:{value:data_list[i]},
success: function(res){
// 1分钟之后执行回调函数
}
})
}
console.log("YanYeek")
```
```js
data_list = [11,22,33]
for(var i=0 ;i++; i < data_list.length){
// 循环发送3次ajax请求,由于ajax是异步请求,所有在发送请求时不会等待.
$.ajax({
url:"...",
data:{value:data_list[i]},
success: function(res){
// 1分钟之后执行回调函数
console.log(i) // 全部输出:2
}
})
}
console.log(i) // 输出:2
```
```js
data_list = [11,22,33]
for(var i=0 ;i++; i < data_list.length){
// 循环发送3次ajax请求,由于ajax是异步请求,所有在发送请求时不会等待.
function xx(data){
$.ajax({
url:"...",
data:{value:data_list[i]},
success: function(res){
// 1分钟之后执行回调函数
console.log(data) // 全部输出:2
}
})
}
xx(i)
}
// 用函数嵌套ajax异步请求,让它同时开了3块不同的空间,i也被data接收变成了三个不同的值,所以实现了回调函数分别打出0,1,2,的效果。
console.log(i) // 输出:2
```
注意事项:如果循环,循环内容发送异步请求,一部任务成功之后,通过闭包来解决。
# day11 文件管理
## 今日概要
- 文件夹管理
- 文件上传
- 思考:限制如何实现?
## 今日详细
### 1.文件夹管理
#### 1.1 创建文件夹
#### 1.2 文件列表 & 进入文件夹
#### 1.3 编辑文件夹
#### 1.4 删除文件夹(DB级联删除 & 删除COS文件)
### 2.文件上传
#### 2.1 上传按钮
#### 2.2 获取临时凭证&上传文件
#### 2.3 右下角展示进度条
#### 2.4 上传文件保存到数据库
# day12 文件上传
## 今日概要
- 获取临时凭证 & 上传文件
- 右下角展示进度条
- 上传文件保存到数据库
- 容量的限制
## 今日详细
### 1.获取临时凭证&上传文件
- 创建项目L添加跨域
- 上传文件前:获取临时凭证
- 全局:默认超时之后JDK自动再次获取(官方推荐)。
ps:new了一个cos对象必须调用才会执行里面的方法发请求。
- 局部:每次上传文件之前,进行临时凭证获取。
- 容量限制:
- 单文件限制
- 总容量限制
注意:容量不合法,错误提示;合法,继续上传
- 继续上传
- 上传成功之后:将当前上传的信息发送至数据库
- 前端向cos上传文件成功之后
- 前端向后台发送请求:文件大小/文件名/文件 。。。(后台数据保存到数据库)

- 实时展示添加的文件
扩展:ajax向后台发送消息
```js
前端:
$.ajax({
data:{name:11. age:22,xx:[11,22,33]}
})
Django后台:
request.POST
request.POST.get('name')
request.POST.get('age')
request.POST.get('xx')
多层嵌套的复杂数据django获取不到
```
```js
前端:
$.ajax({
data: JSON.stringfy({name:11. age:22,xx:[11,22,33]})
})
Django后台:
request.body
info = json.loads(request.body.decode('utf-8'))
info['name']
把数据JSON化才行,接收要用body接收字节后要编码为字符串。
```
# day13


## 今日概要
- 文件管理:下载
- 项目删除
- 问题管理:
- 表结构设计
- 新建问题
- 问题展示列表
- 分页处理
## 今日详细
### 1.下载文件
```
浏览器 django
请求 HttpResponse(...)文本;响应头
请求 render(...) 文本;响应头
请求 ... 文件内容;响应头
```

```python
def download(request):
# 打开文件,获取文件的内容
with open('xxx.xxx', mode ='rb') as f:
data = f.read()
response = HttpResponse(data)
response["Content-Disposition"] = "attachment; filename=xxx.png"
return response
```
### 2.删除项目
- 项目删除
- 桶删除
- 删除所有文件
- 删除碎片文件
- wiki图片思考
- 如果要实现文章的图片删除功能就要加更多没必要的逻辑,服务器压力太大。
- 考虑服务器与开发时间成本不划算。
### 3.问题管理
#### 3.1 设计表结构


```
- 产品经理:功能 +原型图
- 开发人员:第一步表结构设计
```
| ID | 标题 | 内容 | 问题类型 | 模块 | 状态CH | 优先级CH | 指派FK | 关注者m2m | 开始时间 | 结束时间 | 模式 | 父问题 |
| ---- | ---- | ---- | -------- | ---- | ------ | -------- | ------ | --------- | -------- | -------- | ---- | ------ |
| | | | | | | | | | | | | |
| | | | | | | | | | | | | |
| | | | | | | | | | | | | |
| ID | 问题类型 | 项目ID | 颜色 |
| ---- | -------- | ------ | ---- |
| 1 | Bug | | |
| 2 | 功能 | | |
| 3 | 任务 | | |
| ID | 模块 | 项目ID |
| ---- | --------------- | ------ |
| 1 | 第一期 用户认证 | |
| 2 | 第二期 任务管理 | |
| 3 | 第三期 支付 | |
#### 3.2 新建问题
##### 3.2.1 模态对话框
- 显示对话框
- 显示用户要填写的数据(表单)
前端插件:
- bootstrap-datepicker
```
css
js
找到标签处理
```
- bootstrap-select插件
```python
css
js
ModelForm中添加属性
class IssuesModalForm(BootStrapForm, forms.ModelForm):
class Meta:
model = models.Issues
exclude = ['project', 'creator', 'create_datetime', 'latest_update_datetime']
widgets = {
'assign': forms.Select(attrs={'class': 'selectpicker', 'data-live-search': 'true'}),
'attention': forms.SelectMultiple(
attrs={'class': 'selectpicker', 'data-live-search': 'true', 'data-actions-box': 'true'}),
}
class BootStrapForm(object):
bootstrap_class_exclude = []
def __init__(self, *args, **kwargs):
super().__init__(*args, **kwargs)
for name, field in self.fields.items():
if name in self.bootstrap_class_exclude:
continue
old_class = field.widget.attrs.get('class', '')
field.widget.attrs['class'] = f'{old_class} form-control'
field.widget.attrs['placeholder'] = '请输入%s' % (field.label,)
```
#### 3.3 问题列表
#### 3.4 自定义分页(10年前文件)
# day14
## 今日概要
- 添加问题
- 问题列表 + 分页
- 编辑问题
- 回复
- 问题变更
## 今日详细
### 1.添加问题
#### 1.1 数据初始化和合法性
#### 1.2 添加数据(成功之后刷新页面)
#### 1.3 错误提示
`为了避免插入error-msg冲突,把form渲染的内容嵌套一个div,但是bootstrap-select默认会在嵌套一个div,应用了此插件可不用嵌套`
```html
{{ form.status }}
```
#### 1.4 扩展
```
- bootstrap-select
- 下拉框渲染(自定义插件)
```
### 2.问题列表分页
#### 2.1 问题列表
#### 2.2 分页
```
http://127.0.0.1:8000/manage/10/issues/?page=1
http://127.0.0.1:8000/manage/10/issues/?page=2
- 数据库获取数据
models.User.object.all(0:10)
models.User.object.all(10:20)
...
- 显示页面
- 点击当前显示的页面选中
- 显示11个页面(前五个、后五个,根据总页数与当前页,自适应显示,且除page外的其他参数保留不变)
```
了解逻辑,整理出一个class,以后直接用。
### 3.编辑问题
#### 3.1 编辑页面展示
#### 3.2 问题讨论(回复嵌套}
| ID | 内容 | 类型 | 评论者/修改者 | 自己FK | 问题FK |
| ---- | ---- | -------- | ------------- | ------ | ------ |
| | | 回复 | | | |
| | | 修改记录 | | | |
| | | | | | |
##### 3.2.1 ajax请求回去所有评论
- 获取评论
- js嵌套展示
##### 3.2.2 评论 & 回复
- 评论
- 回复
# day15
## 今日概要
- 问题跟新 + 操作记录
- 问题列表筛选
- 邀请成员
## 今日详细
### 1.知识点
#### 1.1 反射
```python
print(xxx_object.name)
getattr(xx_object,"name")
示例1:
request.POST
getattr(reuqest,"name")
示例2:
row = models.User.objects.filter(id=1).first()
row.name
row.email
getattr(reuqest,"name")
```
```python
xxx_object.name = "YanYeek"
setattr(xxx_object,"name","YanYeek")
示例1:
row = models.User.objects.filter(id=1).first()
row.email = "aeff@wef.com"
setattr(row,"email","aeff@wef.com")
row.save()
```
需求:我通过ajax发送一个数据{“v1”: ”email”, “v2”: ”aeff@wef.com”,},{“v1”: ”name”, “v2”: ”YanYeek”,},{“v1”: ”age”, “v2”: ”18”,}, 获取到这个字典后,对数据库中的用户表进行一次更新操作。
后端代码不用更改
```python
def index(request):
data_dict = json.loads(request.body.decode('utf-8'))
user_object = models.User.objects.filter(id=1).first()
setattr(user_object,data_dict["v1"],data_dict["v2"])
user_object.save()
return JsonResponse({"status": Ture})
```
#### 1.2 orm字段
需求:前端发送json{‘key’,: ‘email’}, 后端结束到数据之后,去ORM类User中校验是否允许为空。
```python
class UserInfo(models.Model):
username = models.CharField(verbose_name='用户名', max_length=32, db_index=True) # 创建索引,加快查询速度
email = models.EmailField(verbose_name='邮箱', max_length=32)
phone = models.CharField(verbose_name='手机号', max_length=32)
password = models.CharField(verbose_name='密码', max_length=32)
def index(request):
data_dict = json,loads(request,body.decode('utf-8'))
data_dict["key"] # "email"
models.UserInfo._meta.get_field("email")
field_object.verbose_name # 邮箱;密码
field_object.null # True;False
```
#### 1.3 可迭代对象
如果一个对象中存在`__iter__` 方法,且它返回一个迭代器。那么我们将根据类创建的对象,为可迭代对象。
时可迭代对象支持for循环
```python
class Foo:
pass
obj1 = Foo()
obj2 = Foo()
```
```python
class Bar:
def __iter__(self):
yield 1
yield 2
yield 3
obj3 = Bar()
obj4 = Bar()
for item in obj3:
print(item) # 1 2 3
```
示例:
```python
class Bar:
def __iter__(self):
yield 1
yield 2
yield 3
def index(request):
obj = Bar()
return render(request, 'index.html', {'data_list':obj})
```
```html
...
-
{% for data in data_list %}
- {{ data }} {% endfor %}